Category: Home Improvement

  • Mastering Open Shelving: Balancing Function and Beauty in Your Design

    Introduction to Open Shelving

    Open shelving has emerged as a popular design choice in contemporary interiors, especially within kitchens, living rooms, and workspaces. This trend not only represents a departure from traditional closed cabinetry but also embodies the essence of functional décor, blending aesthetic appeal with practical utility. The allure of open shelving lies in its ability to create a sense of spaciousness and accessibility, allowing individuals to showcase their favorite items while keeping essentials within reach.

    One of the primary advantages of implementing open shelving is the versatility it offers in styling. Homeowners can curate their collections—be it dishware, books, or decorative objects—transforming the shelves into a personal statement that reflects their taste and lifestyle. Through thoughtful shelf styling, open shelving can inject personality into any room, enhancing the overall ambiance while promoting a clutter-free design. With the right arrangement, these shelves can serve as both functional storage and artful displays, elevating the room’s aesthetic.

    However, the natural visibility of items placed on open shelves also presents unique challenges. Maintaining an organized and visually appealing arrangement requires ongoing attention. Dust accumulation and clutter can quickly undermine the intended design. To combat these issues, selecting items that are both beautiful and functional is crucial. Additionally, establishing a routine for regular upkeep ensures that open shelving remains a source of pride rather than a point of stress.

    In essence, open shelving represents a harmonious blend of form and function, inviting a dynamic approach to home styling. By recognizing its benefits and challenges, homeowners can genuinely master the art of open shelving, creating spaces that are not only striking but also practical in their day-to-day usage.

    Choosing the Right Shelving Units

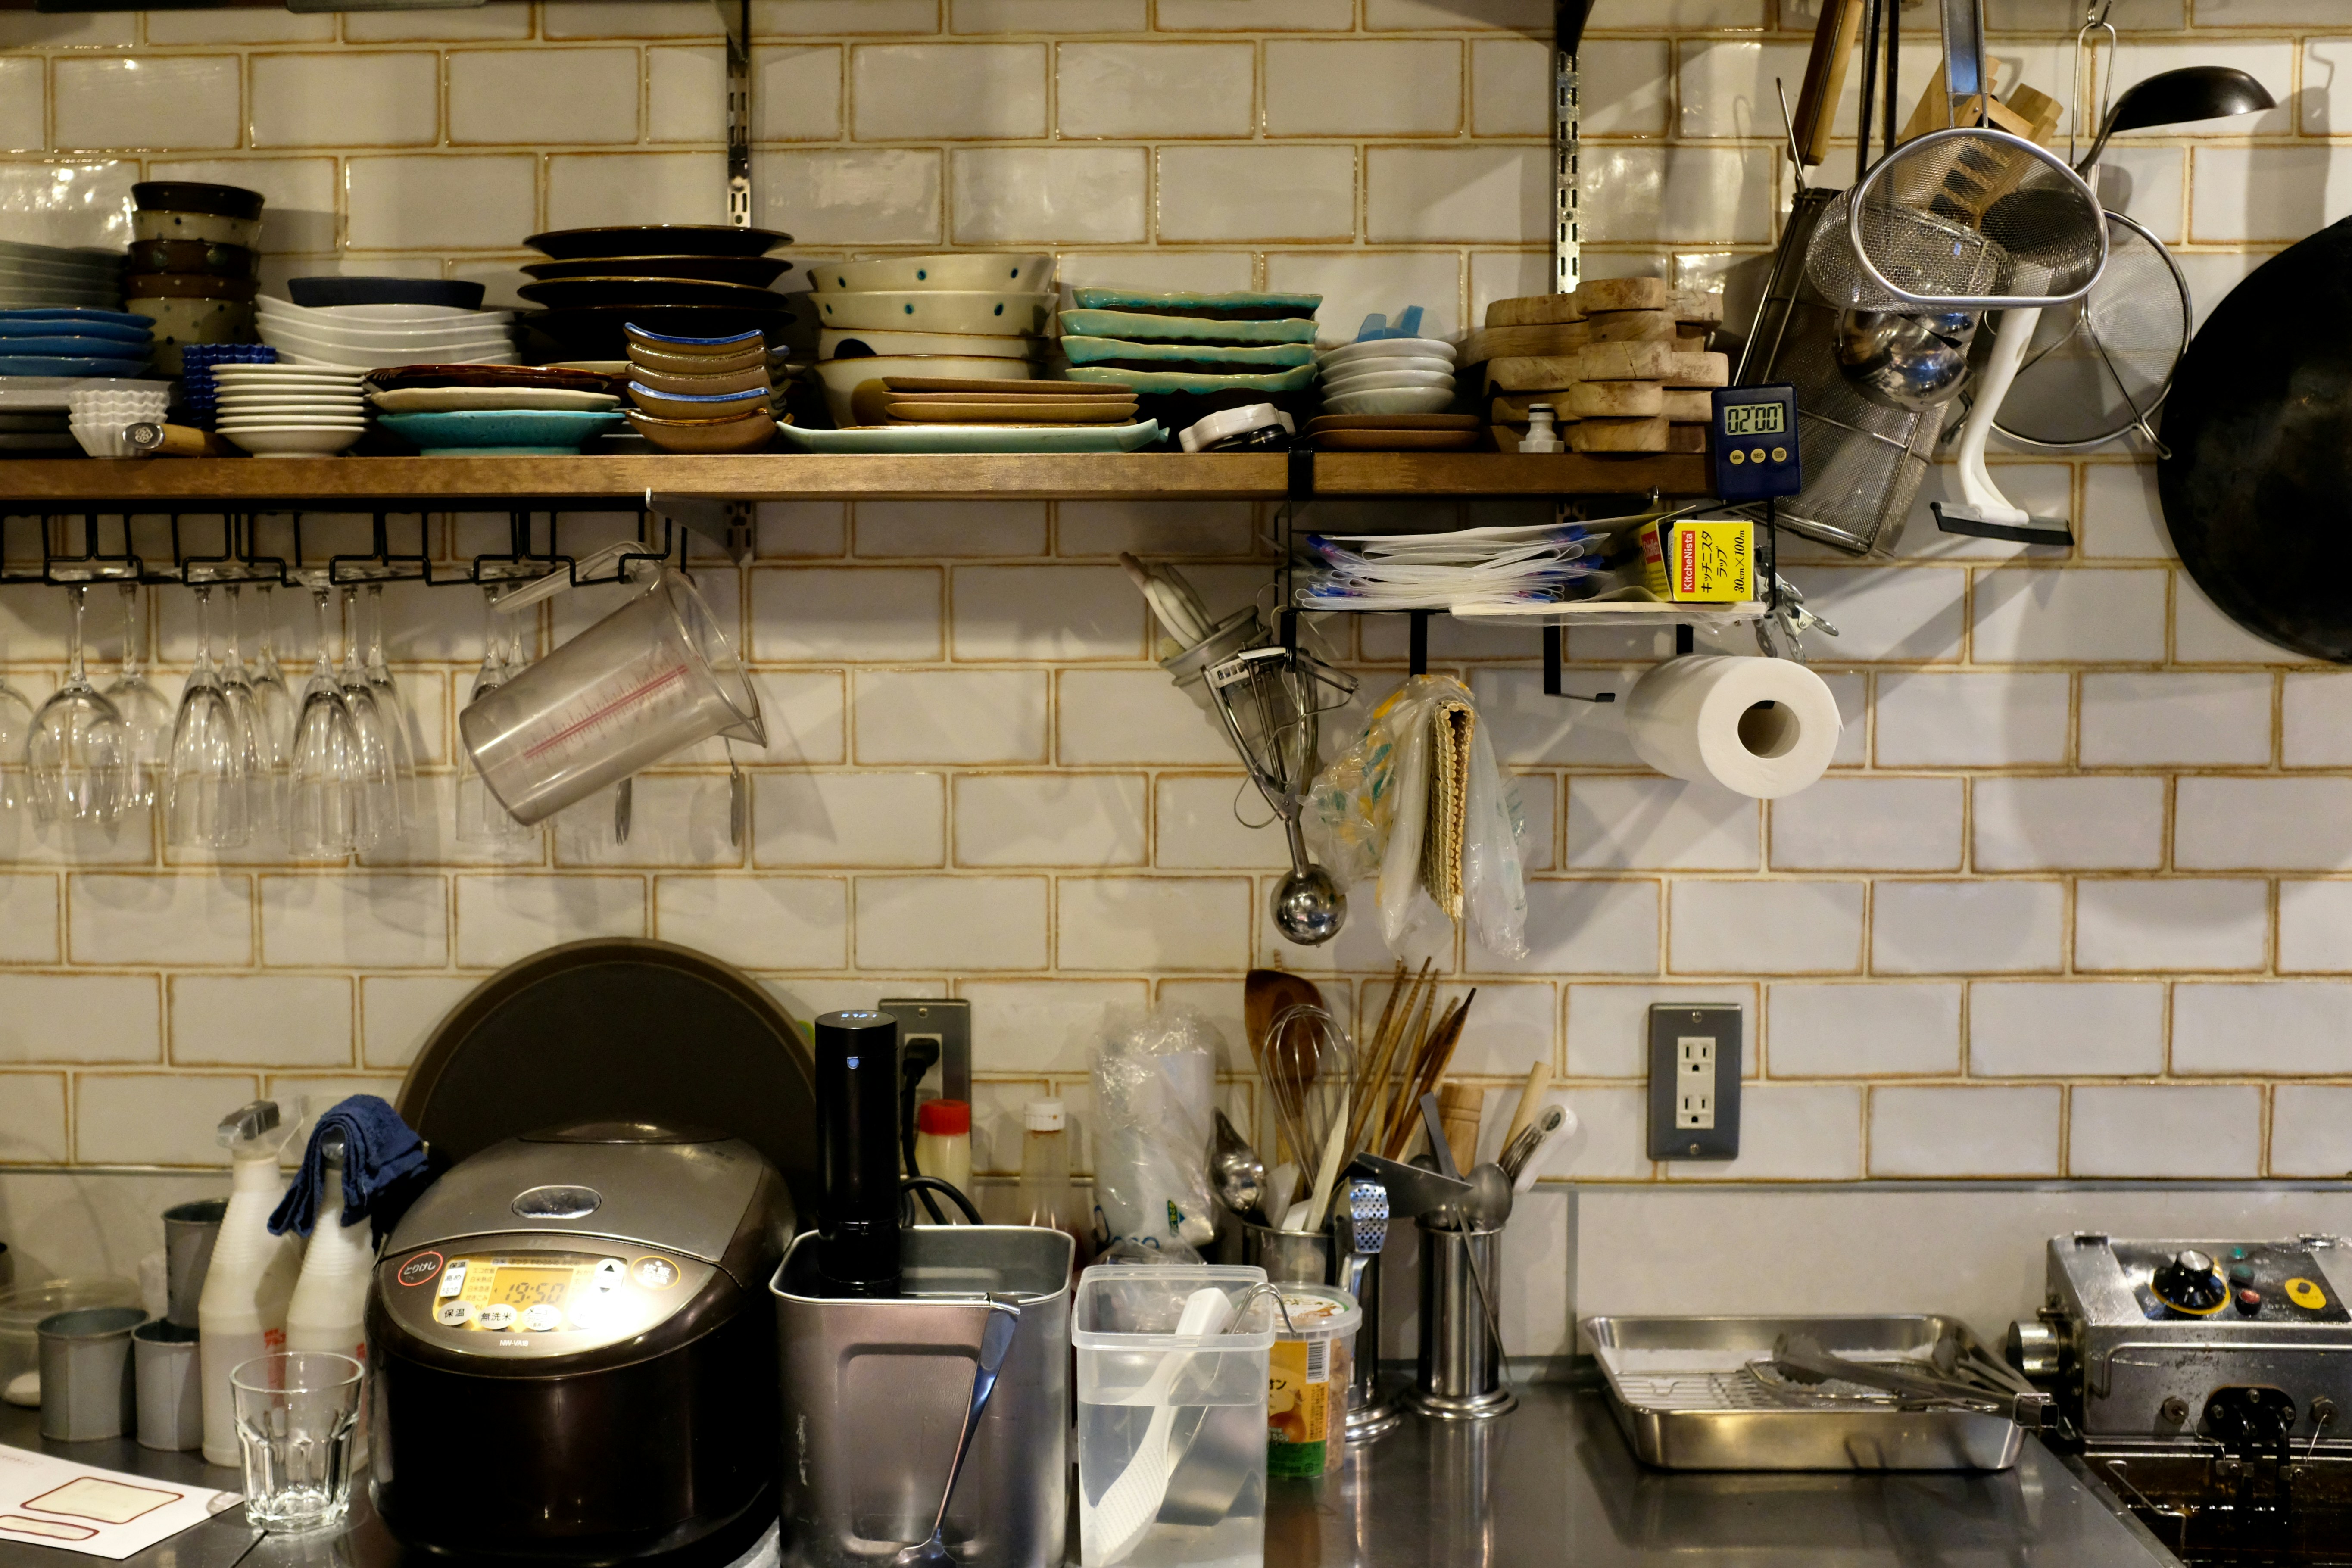
    When it comes to creating an aesthetically pleasing and functional design, the choice of shelving units plays a crucial role. Open shelving has gained popularity for its ability to showcase decorative items while serving practical storage needs. There are various types of shelving units available, each offering unique benefits that can enhance your clutter-free design.

    First and foremost, consider the material of the shelving unit. Common options include wood, metal, and glass. Wooden shelves provide warmth and a classic look, making them an excellent choice for cozy settings. They can be stained or painted to fit various styles—from rustic to contemporary. Metal shelves, on the other hand, offer a modern, industrial vibe and are often more durable, ideal for heavy items. Glass shelves introduce an airy feel, perfect for displaying decorative pieces without overwhelming the space.

    Next, assess the size of the shelving units in relation to your available space. A well-sized shelf will not only accommodate your essentials but also contribute to an organized appearance. Vertical shelving can maximize limited wall space, while wider shelves can serve as functional décor in larger rooms. Moreover, consider the depth of the shelves; these should be deep enough to hold items securely without taking up excessive space.

    Design is another critical factor in selecting open shelving units. Look for options that complement your existing décor. Whether you prefer minimalist designs or more elaborate options with ornate details, your choice should reflect your personal style while maintaining functionality. Additionally, consider adjustable shelving for versatility, allowing you to modify the height based on the items you intend to display.

    Ultimately, selecting the right shelving units involves a balance between aesthetics and practicality. By focusing on material, size, and design, you can create an inviting and organized space that embraces the principles of open shelving.

    The Art of Layering: Stacking and Arranging Items

    Open shelving has gained popularity in contemporary design, offering a unique opportunity to showcase functional décor while maintaining a clutter-free design. The key to successful shelf styling lies in the art of layering and arranging items to create visual interest and harmony. Careful consideration of height, texture, and color can transform ordinary shelves into a stunning focal point in any room.

    When arranging items on your shelves, start by grouping objects of varying heights. This not only aids in drawing the eye but also creates a sense of balance. For example, pair taller books or vases with shorter decorative items such as plants or sculptures. By mixing heights, you can achieve a dynamic display that feels thoughtful and curated, rather than haphazard. Avoid placing all items of equal height on a single shelf, as this can lead to a monotonous appearance.

    In addition to height, incorporate various textures to enrich the visual appeal of your open shelving. Mixing materials such as wood, metal, glass, and fabric can create depth and contrast. For instance, consider pairing a sleek glass vase with rustic wooden crates or woven baskets. This interplay of different textures enhances the overall aesthetic and makes the arrangement more inviting.

    Color also plays a crucial role in shelf styling. To create a cohesive look, opt for a color palette that resonates with your overall interior design. Use bold colors strategically to highlight specific items while balancing them with neutral tones. However, be cautious not to overcrowd your shelves with too many contrasting colors or patterns, as this can create visual chaos. Instead, aim for cohesive clusters that allow each item to shine individually while contributing to the overall theme.

    In conclusion, mastering the art of layering and arranging items on open shelving is essential for creating an impressive display that showcases both functionality and beauty. By carefully considering height, texture, and color, you can establish a clutter-free design that enchants the eye while serving a practical purpose in your space.

    Incorporating Decorative Storage Solutions

    In contemporary interior design, open shelving has become a preferred choice for homeowners looking to strike a harmonious balance between functionality and aesthetic appeal. However, the challenge often lies in maintaining organization on these shelves while simultaneously ensuring they contribute to the overall beauty of the space. A practical approach to achieving this harmony is through the use of decorative storage solutions such as baskets, boxes, and bins.

    Baskets are a versatile option that can effectively house a variety of items. Their texture and form can add a natural element to open shelving, while their practicality fosters a clutter-free design. Woven baskets, for instance, can create visual interest and warmth, allowing you to conceal less visually appealing items. By incorporating baskets of different sizes, you can easily maintain organization while still showcasing selected decorative pieces.

    Similarly, decorative boxes can serve dual purposes, acting as storage for everyday items and enhancing the aesthetic of your open shelves. Choosing boxes with unique designs or stylish materials can enrich the overall shelf styling. You might consider boxes made of wood, metal, or fabric that complement the rest of your décor. When used thoughtfully, these boxes can transform an ordinary shelving unit into an extraordinary focal point.

    Bins are another effective solution that can help maintain tidiness on open shelves. Opt for stylish bins that fit your design theme; they can range from modern to rustic styles. The key is to select bins that not only provide functional storage but also elevate the overall look of the space. By group styling similar items or colors within bins, you can achieve a visually cohesive presentation that adheres to the principles of functional décor.

    By incorporating these decorative storage solutions, you can master the art of open shelving, expertly blending practicality with beauty. This approach not only aids in organization but also emphasizes the significance of aesthetic appeal in your living space.

    Embracing Minimalism: The Less is More Approach

    When it comes to open shelving, adopting a minimalist approach can be transformative, promoting a clean, organized aesthetic while maximizing functionality. Minimalism is not just a design trend; it embodies a philosophy that encourages individuals to declutter their spaces and prioritize items that truly matter. This approach aligns perfectly with the principles of effective shelf styling, where fewer items can create a more impactful visual story.

    The concept of a clutter-free design is central to minimalism. By reducing the number of decorative objects and focusing on essentials, one can achieve a serene atmosphere that enhances both the style and function of open shelves. This simplicity allows each chosen item to shine without the distraction of visual noise. Selecting a limited number of well-curated pieces, such as artful dishes, books, or plants, can result in a more engaging display that draws the eye and creates a sense of harmony.

    Another advantage of this less is more approach is that it encourages thoughtful selection. When styling open shelving, consider how each piece contributes to the overall aesthetic and function of the space. Opting for items that serve dual purposes—like decorative storage boxes that keep clutter at bay while looking stylish—can greatly enhance the utility of your décor. By deliberately choosing functional décor, homeowners can create open shelving that not only looks beautiful but also serves a practical role in everyday life.

    Ultimately, the minimalist approach fosters a deeper appreciation for the aesthetics and functionality of your space. Embracing the idea of open shelving as a canvas for intentional design leads to a striking balance between beauty and practicality, inviting visitors to experience a serene and organized environment that reflects personal style.

    The Role of Functionality in Open Shelving

    Open shelving has gained popularity in contemporary home design, not just for its aesthetic appeal but also for its practical advantages. When integrating open shelving into a space, it is essential to prioritize functionality in order to create an environment that is both visually appealing and efficient. Functional décor in open shelving can help to inspire creativity while emphasizing organization and accessibility.

    One significant advantage of open shelving is its ability to display everyday items that are frequently used. By strategically placing these items on shelves that are easily accessible, individuals can minimize time spent searching for utensils or serving ware while preparing meals or entertaining guests. For instance, placing dishes on the lowest or middle shelves can provide ease of access, particularly for those who engage in cooking or serving regularly. This not only contributes to a clutter-free design but also elevates the practical aspects of the shelves.

    Moreover, shelf styling plays a pivotal role in ensuring that the practical elements blend seamlessly with the decorative aspects. When showcasing items, it is advisable to group them in a way that maintains a cohesive look. This can be achieved by using decorative baskets or containers that can house smaller items while also complementing the overall style of the room. Additionally, a mix of materials, such as wood, metal, or glass, can introduce visual interest while catering to different functional needs.

    Ultimately, achieving a successful balance between aesthetics and functionality in open shelving requires thoughtful planning. By considering both the decorative potential and the practical use of the shelves, homeowners can create a stylish yet effective display. Properly styled and intentionally curated open shelving can transform a space into a harmonious blend of beauty and utility, enhancing the overall living experience.

    Using Colors and Textures to Enhance Visual Appeal

    Incorporating colors and textures into open shelving can significantly enhance the visual appeal of your space while maintaining a clutter-free design. The selection of an appropriate color palette is foundational in achieving a cohesive look. Begin by choosing a primary color that resonates with the overall theme of the room, then complement it with two or three additional colors that either harmonize or provide contrast. This intentional curation creates balance and ensures that the shelf styling contributes to the room’s aesthetic rather than detracting from it.

    When it comes to textures, a mix is essential for depth and interest. Combining different materials such as wood, metal, ceramic, and fabric can bring a rich, layered look to your shelves. For instance, you might use a sleek ceramic vase next to a rustic wooden box, or a knitted basket alongside metal bookends. This variety allows each piece to stand out while also working together to create a unified design. Consider the tactile qualities of materials, as textures can evoke feelings and improve the overall atmosphere of your room.

    It is also important to be mindful of the scale and proportion of items on your shelves. Large, bulky objects should be balanced with smaller items, and placing them at different heights can further enhance visual interest. When styling open shelving, keep in mind that functional décor does not have to sacrifice beauty. Items such as decorative storage containers, books, and well-placed plants can serve practical purposes while also enhancing your design. Ultimately, by thoughtfully selecting colors and integrating various textures, you can create an open shelving display that is both attractive and functional.

    Plant Life: Adding Natural Elements to Your Shelves

    Incorporating plant life into open shelving designs offers a multitude of benefits that enhance both aesthetics and functionality. Plants can bring a refreshing vibrancy to your shelves, transforming a simple storage solution into a dynamic display. When thoughtfully styled, greenery can seamlessly integrate into your clutter-free design, creating a space that is as inviting as it is practical.

    Some ideal choices for shelf plants include succulents, ferns, and trailing vines. Succulents, with their compact form, can fit snugly on small shelves while adding a touch of modern elegance. Ferns, with their lush foliage, can add texture and softness, breaking the rigid lines of shelves. Trailing plants, such as pothos or philodendrons, can drape elegantly over the edges, creating a visually appealing waterfall effect that draws the eye. These plant varieties not only add life to the shelves but also contribute to a cheerful atmosphere in the room.

    Beyond aesthetics, many houseplants offer natural air-purifying qualities, enhancing the overall environment. For instance, snake plants and peace lilies are celebrated for their ability to improve air quality by filtering out harmful toxins. This dual benefit of beauty and functionality makes plants an essential element in any shelf styling project, reinforcing the idea that open shelving can serve both a decorative and practical purpose.

    Choosing the right pots and planters also plays a significant role in achieving a cohesive look. Opting for materials and colors that resonate with the surrounding décor can elevate the overall appeal of your shelving unit. As you select plants and style your shelves, consider the balance between greenery and other displayed items to maintain an uncluttered appearance while reflecting your personal aesthetic.

    Ultimately, the integration of plant life into your open shelving not only beautifies your space but also contributes to a healthier indoor environment, encouraging a harmonious and lively atmosphere.

    Final Thoughts: Maintaining Balance and Style

    Open shelving has become an increasingly popular choice for modern interiors, blending functionality with aesthetic appeal. The key to successful open shelving lies in striking a balance between efficient organization and visual allure. As we have discussed, achieving a clutter-free design requires careful consideration of what items are displayed. Less is often more, with a focus on a few curated pieces rather than overcrowding the shelves. This allows each item to shine and contributes to an inviting atmosphere.

    It is essential to think about shelf styling from the perspective of both practical use and beauty. Consider using containers or decorative baskets to hold smaller items to keep shelves looking neat. Utilize trays to group similar objects together, creating a cohesive look while enhancing functionality. When selecting decorative pieces, consider a range of textures and heights to enhance visual interest without overwhelming the space. Incorporating plants or flowers can also introduce a touch of nature, offering both beauty and warmth to the overall aesthetic.

    As you venture into styling your open shelving, have a checklist at hand to ensure you maintain that much-needed balance. Assess your collection—identify what items are necessary for daily use and what can serve a purely decorative purpose. Regularly reassess the arrangement; keeping your space dynamic can maintain its appeal over time. Rotate items based on seasons or special occasions to keep the display fresh and engaging. Remember that functional décor does not have to compromise style. Decorative yet practical items can manage to meet both needs, ensuring your open shelving remains an attractive feature in your home. In conclusion, a well-styled open shelf can serve as a beautiful focal point in any room while promoting an organized and functional living space.

  • Creating a Striking Gallery Wall on a Budget: DIY Printables, Photos, and Frames to Showcase Your Personal Stories

    Introduction to Gallery Walls

    Gallery walls have emerged as a prominent trend in home décor, reflecting individual tastes and personal stories through the art of display. Essentially, a gallery wall consists of a collection of artworks, photographs, and other decorative pieces arranged cohesively to create a striking visual narrative. This concept allows homeowners to blend their favorite art pieces and cherished memories into a curated exhibit that can change depending on mood or occasion.

    The growing popularity of gallery walls can be attributed to their versatility and the opportunity they provide for self-expression. By combining various art forms, such as prints, photographs, and even DIY décor projects, individuals can tell their stories, showcasing their passions, travels, or family milestones. This personal touch not only enhances the aesthetic of a room but also fosters a deeper emotional connection to the displayed items.

    For those on a budget, creating an impactful gallery wall is entirely achievable without the need for expensive art pieces. Affordable art options, such as downloadable printables or photographs taken on personal travels, can be easily integrated into the wall design. Additionally, a variety of inexpensive frames can be sourced from second-hand stores or crafted using upcycled materials, allowing one to assemble a unique collection that resonates with their personal style.

    In essence, a gallery wall serves as an engaging canvas where art meets storytelling, encouraging creativity and individual expression. Whether you are a seasoned art enthusiast or a novice looking to enhance your living space, the process of curating your own gallery wall is not only fulfilling but also provides an opportunity to transform your home into a reflection of you, all while maintaining an affordable approach.

    The Power of DIY Art: Crafting Your Own Printables

    Creating a gallery wall can be an exquisite yet cost-effective way to personalize your home with art that resonates with your individual style. One of the best approaches to achieving this is through DIY printables, which allow you to design art pieces that embody your personal story while keeping expenses in check. With numerous online resources available, crafting your own art is more accessible than ever.

    To begin the creative process, it is essential to gather inspiration. Websites like Pinterest and Instagram offer a plethora of ideas ranging from typography prints to abstract designs. By curating a mood board, you will gain clarity on themes, colors, and styles that reflect your aesthetic. This initial step is fundamental in determining the direction of your gallery wall.

    Next, consider utilizing free or affordable design tools like Canva or Adobe Spark, which provide customizable templates and user-friendly interfaces. These platforms allow you to modify elements such as colors, fonts, and layouts, enabling you to create designs that align with your personal decor style. Additionally, many online sources offer free downloadable printables, which can serve as a foundation for your gallery wall, elevating it without the financial burden of purchasing all new art.

    Once you have crafted a few prints, the execution phase involves selecting suitable frames and arranging your pieces on the wall. Mixing different frame styles and sizes can add depth and interest to your gallery wall, enhancing the overall aesthetic. A well-curated gallery wall not only showcases your creativity through DIY décor but also narrates your journey and experiences through visual storytelling.

    Engaging in the DIY process results in unique art that is not only affordable but also rich with personal significance, making your space truly one-of-a-kind.

    Using Personal Photos to Tell Your Story

    Incorporating personal photographs into your gallery wall is an excellent way to add emotional resonance and nostalgia to your DIY décor. These images can encapsulate cherished memories, significant milestones, or everyday moments that define your personal style. To curate a gallery wall that truly reflects your identity, it is essential to select photographs that hold meaning for you and your loved ones.

    When choosing photos, consider those that evoke strong emotions or tell a unique story about your life. Family gatherings, vacations, or special occasions can serve as focal points of your display. You might also explore candid shots that capture everyday interactions, revealing your personality and lifestyle. In this way, a gallery wall becomes not just a decorative feature but also an ongoing narrative of your journey.

    After selecting your images, consider editing them to enhance their visual consistency and appeal. Basic editing tools can adjust brightness, contrast, and saturation, making your photos harmonize well. Additionally, you may opt for various styles, such as black and white for a classic look, or colorful filters for a vibrant, modern feel. Such editing can improve the gallery wall’s overall aesthetic, ensuring a cohesive presentation that resonates with your personal style.

    As you arrange your photos, think creatively about how to display them. Mixing different frame styles and sizes can add visual interest, while a well-planned collage can tell a more intricate story. You might also incorporate small decorative elements alongside your photos, creating a dynamic layout that captures the viewer’s attention. By integrating meaningful personal photographs into your gallery wall, you not only enhance the overall character of your space but also create a lasting tribute to your life experiences.

    Choosing Affordable Frames: A Guide to Budget-Friendly Options

    Creating a stunning gallery wall on a budget begins with selecting the right frames. Affordable frames come in various styles, colors, and materials that can enhance the overall aesthetic of your DIY décor while showcasing your personal style. One of the best sources for budget-friendly options is local thrift stores and flea markets, where you can discover unique frames at a fraction of retail prices. Often, these frames can be upcycled with a little paint or new backing, allowing you to customize them to suit your décor.

    Online marketplaces such as Facebook Marketplace, Etsy, or eBay also present an excellent opportunity to find affordable art frames. Many sellers offer pre-loved options that can save money while providing a distinctive touch. It’s also worth checking out clearance sections in local craft stores or large home goods retailers, which often feature frames at discounted prices. Prioritize finding frames in different shapes and sizes to create an eclectic look that stands out on your gallery wall.

    Frame materials vary widely; however, wood, metal, and synthetic materials each bring unique attributes to your display. Wooden frames can convey warmth and richness, while sleek metal frames can add a modern minimalist appeal. For a cost-effective solution, consider making your own frames using MDF (medium-density fiberboard) or even cardboard, allowing for complete creative freedom. This DIY approach not only saves on costs but ensures your gallery wall reflects your personal style.

    When choosing colors, neutrals tend to work well for any décor, but don’t shy away from bold colors if they align with your vision. Ultimately, the right combination of affordable frames can transform your gallery wall into a striking display without breaking the bank.

    Mixing Textures and Materials for Visual Interest

    Creating a striking gallery wall is not solely about the visual appeal of the art pieces themselves, but also about the combination of various textures and materials that add depth and interest to the overall display. Incorporating an eclectic mix of elements—such as wood, fabric, and canvas—can elevate a collection of affordable art while enhancing your personal style.

    Wooden frames can bring a rustic charm to your gallery wall, providing a natural contrast to softer materials like fabric or textured canvas prints. Consider using distressed wood frames for a vintage look or sleek, modern designs for a more contemporary feel. Canvas prints, especially those with unique finishes or textures, can add a tactile element to the wall. With different dimensions and profiles, they can create visual intrigue, drawing the eye across the entire display.

    Using fabric is another effective approach to diversify your gallery wall. For instance, incorporating textured textiles such as burlap or linen between framed artwork can soften the harsh lines often seen in traditional gallery arrangements. A piece of fabric can also function as a backdrop for smaller art pieces, offering a dynamic element that contrasts the rigid nature of frames. Wall hangings or even fabric-covered pinboards can provide an organic feel while serving as ideal backdrops for displaying photos, printables, or personal mementos.

    Unique display methods further enhance the gallery wall’s visual impact. For example, using a wire or string to hang lightweight elements allows for easy rearrangement, encouraging a continually evolving display reflecting your personal journey. Incorporating shelves or ledges can also allow for layering art pieces without compromising space, offering depth and dimension. By thoughtfully mixing textures and materials, you can create a cohesive yet visually stimulating gallery wall that showcases your individuality and transforms your home.

    Arranging Your Gallery Wall: Layout Ideas and Tips

    Creating a stunning gallery wall is an excellent way to showcase your personal style while staying within budget. The arrangement is a crucial factor in the overall impact of your display. There are several layout styles you can choose from, including grid, salon, and asymmetrical arrangements, each offering a unique aesthetic to your space.

    The grid layout is characterized by a clean and structured appearance. In this configuration, you align frames in straight rows and columns, which offers a sense of order and symmetry. To achieve this, start by measuring the wall space you wish to cover. Mark the dimensions with a pencil to visualize how the final arrangement will look. It’s essential to maintain consistent spacing between frames, generally around 2 to 3 inches, for visual harmony.

    Salon-style arrangements provide a more eclectic and personalized touch. This style encourages creativity, allowing you to mix various frame sizes and shapes. Begin by laying your selected artworks on the floor to experiment with different configurations before committing to the wall. In this arrangement, balance is key; while the pieces can vary in size, they should complement each other in theme or color to create a cohesive look.

    Lastly, the asymmetrical arrangement is perfect for those who prefer a more casual or modern aesthetic. This method allows for greater freedom in spacing and frame styles, giving your gallery wall a less traditional appearance. Measure the wall and start by placing the largest piece first, working your way outwards with smaller pieces. Maintain a visual balance by grouping pieces that share common colors or styles to ensure the final arrangement feels intentional.

    Regardless of the style you choose, remember to take your time when arranging your gallery wall. Experimentation is vital, and using affordable art can help you refine your personal style without overspending. Ultimately, a well-thought-out arrangement will bring your gallery wall to life, creating a space that reflects your unique story.

    Incorporating Quotes and Text: Adding a Personal Touch

    Enhancing a gallery wall with quotes and text is an excellent way to inject a personal narrative into your space. Quotes can serve as powerful reminders of your values, aspirations, or cherished memories. They have the ability to resonate deeply with viewers, creating a dialogue between the art and those who observe it. When selecting quotes, consider those that reflect your personal style and experiences, whether they are motivational phrases, song lyrics, or meaningful sayings that inspire you daily.

    Typography plays a crucial role in this aspect of your gallery wall. The style of the font can completely alter the mood of the text, making it essential to choose wisely. Serif fonts offer a classic, elegant aesthetic, while sans-serif fonts can create a modern and minimalist feel. You might even explore handwritten fonts to add a more personal and intimate touch. Mixing different font styles can create visual interest, but be careful to maintain harmony across the entire wall, ensuring that your gallery wall retains a cohesive look.

    Creating the text art can be accomplished through various DIY methods that are both affordable and enjoyable. Crafting printable designs using graphic design software or online templates allows for customization to ensure the text aligns with your vision. Additionally, you could hand-letter quotes with paint or markers on canvas or wood panels, adding an authentic touch that reflects your artistic flair. Cleverly blending these written elements with images enriches the storytelling and creates a dynamic visual experience. Think of using similar color palettes and themes for both text and images to create balance and continuity throughout your gallery wall.

    By merging your favorite quotes with your cherished photographs and artwork, your gallery wall not only showcases your aesthetic preferences but also narrates your unique story, enhancing the overall appeal of your DIY décor.

    Updating Your Gallery Wall: Tips for Refreshing Your Space

    Refreshing your gallery wall is an excellent way to keep your decor dynamic and reflective of your evolving personal style. One effective strategy is to periodically swap out art pieces or photographs. This not only prevents the display from becoming stale, but it also allows you to showcase new memories and art that resonate with your current experiences. Consider keeping a selection of affordable art prints that you can easily change out, allowing you to maintain a consistent theme while keeping things fresh.

    Another practical approach is to rotate your photos. This can be accomplished by simply changing the frames you use or rearranging the placement of existing pieces. This small shift can create a transformed ambiance in your space. For instance, if you’ve recently taken a trip, consider adding a photo or two from that experience to your gallery wall, capturing a moment that speaks to your adventurous side. You could even incorporate a seasonal element; in the fall, you might introduce warm tones or autumn-themed artwork, while winter could usher in cozy, snowy scenes.

    Moreover, embracing DIY decor can enhance your gallery wall’s impact without breaking the bank. Create custom pieces by framing your children’s artwork, or print quotes that inspire you. Such contributions add a personal touch and make your gallery wall a true representation of your life’s journey. When refreshing your space, consider the layout as well – varying the arrangement can lead to exciting new aesthetic outcomes. Experiment with different shapes and sizes of frames, or introduce 3D elements like small shelves to provide depth. By following these strategies, you can craft a gallery wall that remains a vibrant reflection of your life story, continually enriched with new chapters.

    Conclusion: Embracing Your Personal Style

    Creating a gallery wall is more than just an aesthetic endeavor; it is an opportunity to display your unique personal style and share the stories that matter most to you. Throughout this blog post, we have explored various aspects of designing a striking gallery wall on a budget, emphasizing the importance of incorporating affordable art, cherished photographs, and DIY décor. By curating a collection of pieces that resonate with your experiences and interests, you can transform a blank wall into a vibrant representation of your life.

    The journey of establishing a gallery wall begins with understanding your design preferences and the emotional connections tied to the artworks you choose. Whether you opt for framed family photos, inspiring quotes, or abstract prints, the selection should reflect your tastes and aesthetics. Furthermore, utilizing budget-friendly options such as DIY projects or printables can make this creative process accessible for everyone, regardless of financial constraints. This approach not only promotes sustainability but also instills a sense of accomplishment and individuality.

    Additionally, arranging the elements of your gallery wall is an artistic venture in itself. The layout should encourage balance and harmony while showcasing the diversity of your collection. Experimentation with different frame sizes, colors, and orientations can lead to a whimsical yet cohesive display that speaks to your personal narrative. Remember, a gallery wall is not static; it can evolve over time as you acquire new pieces or seek to refresh the visual story you are telling.

    Ultimately, we encourage you to embark on your own gallery wall project. Embrace creativity, let your individuality shine, and curate a space that feels authentically you. With thoughtful selection and design, your gallery wall can serve as a constant reminder of your most treasured memories and personal journey.

  • Simple Fixes for Squeaky Doors, Loose Tiles, and More: DIY Maintenance Under 30 Minutes

    Introduction to Easy DIY Maintenance

    Homeownership often comes with the responsibility of addressing various maintenance tasks to ensure a comfortable and functional living environment. Easy DIY maintenance refers to the array of simple tasks that can be performed without the need for extensive skills or expensive tools. This approach not only empowers homeowners but also offers a cost-effective way to tackle common household issues such as squeaky doors and loose tiles.

    These minor problems, while seemingly insignificant, can lead to greater inconveniences if left unaddressed. For instance, squeaky doors not only disrupt the tranquility of your home but may also indicate larger issues with door alignment or hinges. On the other hand, loose tiles can pose safety hazards, leading to accidents or further damage if the underlying issue is not resolved. Fortunately, many of these easy repairs can be completed in less than 30 minutes, allowing homeowners to quickly restore their living space without requiring professional assistance.

    In addition to preserving the aesthetics and functionality of a home, engaging in DIY maintenance tasks offers a tangible sense of accomplishment. Homeowners can gain confidence in their ability to tackle repairs, which may encourage them to take on more challenging projects in the future. Simple tasks like fixing squeaky doors, repairing loose tiles, or conducting routine checks can easily become part of a homeowner’s regular maintenance routine.

    Embracing an easy DIY maintenance mindset can transform the way we approach home repairs, making it simpler and more approachable for everyone. Through awareness of common household issues and the benefits of quick fixes, individuals can ensure their homes remain a pleasant place to live, all while saving time and money.

    Understanding the Common Causes of Household Issues

    Household issues such as squeaky doors and loose tiles are prevalent challenges that many homeowners encounter. Understanding the common causes behind these problems is crucial for effective resolution through easy DIY maintenance. Typically, wear and tear result from daily usage, which can significantly contribute to the deterioration of various household fixtures.

    For instance, squeaky doors can often be traced back to the hinge mechanisms. Dust, dirt, and lack of lubrication can cause friction, leading to that annoying squeaking sound. This issue can usually be fixed within minutes by applying a few drops of lubricant. By addressing these minor repairs promptly, homeowners can prevent further damage and maintain their home efficiently.

    Additionally, environmental changes, such as humidity and temperature fluctuations, may influence the integrity of household materials. Wooden elements, for example, can expand and contract, leading to loose tiles or misaligned doors. Such environmental factors are often overlooked, yet they play a significant role in the maintenance issues faced in the home.

    Neglect can exacerbate these problems, making them more complex and time-consuming to fix. When minor repairs are deferred, they can evolve into more significant issues that require more than mere quick fixes. Regularly inspecting and addressing issues like loose tiles can save homeowners from costly repairs and extensive renovation projects down the line. Home repairs under 30 minutes should focus on identifying simple signs of wear, addressing squeaky doors, and tightening loose tiles before they escalate into a larger endeavor.

    By gaining insights into the causes of these common household issues, homeowners will not only feel empowered to tackle them but also enhance the overall longevity of their living spaces. This proactive approach promotes a healthier environment and increases the comfort of the home.

    Fixing Squeaky Doors: A Step-by-Step Guide

    Squeaky doors can be an annoying distraction in any home, but fortunately, fixing them is one of the many easy DIY maintenance tasks that can be completed in under 30 minutes. The first step in addressing this issue is to identify the source of the squeak. Typically, the noise originates from the door hinges, which may have accumulated dirt or may simply need lubrication. To begin, gather the necessary materials: a lubricant (such as WD-40 or silicone spray), a clean cloth, and a flathead screwdriver.

    Once you have your materials ready, open the door and ensure it is stable. Use the flathead screwdriver to gently remove any screws from the hinge to inspect it more closely. In many cases, a buildup of dust and grime can contribute to the squeaking sound. Wipe down the hinge with the clean cloth to remove any debris. After thoroughly cleaning the hinge, it’s time to apply the lubricant. Spray the lubricant liberally onto the hinge, ensuring it penetrates all moving parts. If using a spray, take care not to oversaturate, as this can attract more dirt over time.

    After applying the lubricant, slowly open and close the door multiple times. This action helps distribute the lubricant evenly throughout the hinge mechanism, providing immediate relief from the squeak. If the noise persists, inspect for any damaged components that may need replacement. Regular maintenance of your door hinges can also be beneficial; consider applying lubricant periodically to prevent future squeaks. By taking these simple steps, you can effectively fix squeaky doors and enhance the overall functionality of your home without investing much time or resources. Easy DIY maintenance not only improves your living space but also contributes to a more peaceful environment.

    Repairing Loose Tiles: A Quick DIY Solution

    Repairing loose tiles is a common home repair task that can be accomplished in under 30 minutes with the right approach. This process not only prevents further damage to your flooring but also enhances the aesthetics of your space. Firstly, it is crucial to assess the extent of the damage. In most instances, a single loose tile can easily be remedied without the need for extensive tools or professional help.

    To begin, you will require a few basic tools: a putty knife, tile adhesive, a grout float, and if necessary, a new grout. Additionally, having safety goggles and gloves on hand is advisable to protect yourself during the repair process. Start by carefully prying up the loose tile using the putty knife. It is important to do this gently to avoid breaking it or damaging surrounding tiles.

    Once you have successfully removed the tile, clean the subfloor area beneath as well as the back of the tile to ensure a good bond. Apply a thin layer of tile adhesive to the subfloor, spreading it evenly with the putty knife. Afterward, reattach the tile, pressing it firmly into place. Make sure it is level with the surrounding tiles. If necessary, leave it for a short period to allow the adhesive to set.

    After the adhesive has dried, proceed to fill in the gaps with grout. Use the grout float to push the grout into the seams around the tile. This step is essential to secure the tile further. Wipe away excess grout carefully to maintain a neat finish. In summary, fixing loose tiles is an essential aspect of easy DIY maintenance that can be completed swiftly, ensuring your home remains both functional and visually appealing. Just like fixing squeaky doors, this task provides a sense of accomplishment and enhances your living environment.

    Dealing with Creaky Floorboards: Simple Fixes

    Creaky floorboards can be a common nuisance in many households, often resulting from seasonal changes, humidity levels, or general wear and tear. They are typically symptomatic of loose floorboards or inadequate support structures underneath. Fortunately, addressing this issue can consist of easy DIY maintenance solutions that can be completed in under 30 minutes.

    The first step in fixing these creaks is identifying the locations of the problematic boards. Walk across the floor with a keen ear, noting areas that respond with noticeable sound. This process may involve slightly shifting your weight over the boards to pinpoint the exact creaky spots. Once identified, you can consider potential fixes, one of which involves using wood shims. Shims are thin wedges that can help create tighter fits between the floorboards and the joists below, effectively reducing movement and sound.

    Additionally, if your boards are screwed down, it may simply require tightening screws or replacing any that have become stripped. For this process, you will need a drill, suitable screws, and a screwdriver. Ensure you apply steady pressure when driving screws to avoid damaging the wood. If the squeak persists, consider adding a bit of paraffin wax or talcum powder into the crevices between the boards, as these can help lubricate them and minimize noise.

    After implementing one or both of these fixes, it’s vital to test the results. Walk over the floorboards again to check if the squeaks have been eliminated. This straightforward approach to handling creaky floorboards exemplifies how home repairs under 30 minutes can lead to a quieter, more enjoyable space. As with all home repairs, consistent maintenance is key to avoiding the reoccurrence of these frustrating sounds.

    Fixing Running Toilets: An Easy Maintenance Task

    A running toilet can be a significant inconvenience in any household, not only creating a consistent annoyance with its sound but also contributing to increased water bills. Fortunately, this is a common issue that can be addressed through easy DIY maintenance. Understanding the common causes of a running toilet, such as faulty flappers or fill valves, is the first step in rectifying the problem.

    The flapper is a rubber piece found at the bottom of the toilet tank that seals the water in during a flush. Over time, these flappers can wear out or warp, leading to water continuously leaking into the bowl. To diagnose the issue, start by removing the tank lid and inspecting the flapper. If it appears damaged or does not sit properly, it may need to be replaced. This task typically takes less than 30 minutes and involves simply unhooking the old flapper and attaching a new one, which is available at any hardware store.

    Another common culprit is the fill valve, which controls the water entering the tank. A malfunctioning fill valve may lead to the tank not filling properly, thus causing it to run continually. To inspect the fill valve, listen for any strange sounds while the tank is filling. If it sounds off or if the water level is too high, a simple adjustment or replacement may be necessary. Adjusting the float to the correct level can sometimes resolve the issue without needing a full replacement.

    By identifying the issues with the flapper and fill valve, you can quickly execute these straightforward home repairs under 30 minutes. Not only will this restore the normal function of your toilet, but it will also help you save on water bills and contribute to a more efficient, well-maintained home.

    Sealing Gaps and Cracks: A Quick Caulking Guide

    Sealing gaps and cracks in your home is essential for both energy efficiency and pest prevention. Gaps can allow heated or cooled air to escape, leading to increased energy costs and discomfort. Furthermore, these openings can serve as entry points for insects and rodents, making it crucial to address them promptly. Applying caulk is an effective and easy DIY maintenance task that can be accomplished within 30 minutes.

    There are several types of caulk available, each suited for specific applications. Latex caulk is ideal for indoor use as it is easy to apply, paintable, and can be cleaned up with water. Silicone caulk, on the other hand, is more durable and water-resistant, making it perfect for areas exposed to moisture like kitchens and bathrooms. For exterior applications, consider using polyurethane caulk, which offers flexibility and strong adhesion against varying weather conditions. Choosing the right caulk for your needs enhances the effectiveness of your repairs.

    To apply caulk effectively, follow these simple steps. First, gather your materials: a tube of your chosen caulk, a caulk gun, a utility knife, and a caulking tool or your finger for smoothing. Start by cleaning the area around the gap or crack to ensure proper adhesion. Next, cut the tip of the caulk tube at a 45-degree angle, aiming for a small opening to control the flow. Load the tube into the caulk gun, and apply a continuous bead along the gap, ensuring consistent pressure. Finally, smooth the caulk with your chosen tool to create a neat finish and remove any excess with a damp cloth.

    By sealing gaps and cracks effectively, you not only enhance the comfort and efficiency of your home but also embark on a fulfilling home repair project that can be completed in under 30 minutes.

    Preventive Maintenance Tips: Keeping Issues at Bay

    Homeownership brings with it the responsibility of regular maintenance to ensure the longevity and functionality of your living space. Implementing an effective preventive maintenance strategy can greatly reduce the occurrence of common household issues, from squeaky doors to loose tiles. By dedicating a little time each month, homeowners can avoid larger repairs that may require significant time and expense.

    Regular checks of various home components are essential in identifying potential problems before they escalate. For instance, taking the time to inspect door hinges or the alignment of tiles can help pinpoint areas that may require assistance. A simple application of lubricant can often fix squeaky doors, while adjusting misplaced tiles can prevent further damage and deterioration. Establishing a routine inspection schedule, perhaps on a quarterly basis, allows homeowners to catch minor issues early, reducing the need for home repairs that take longer than 30 minutes.

    Incorporating cleaning routines into your maintenance plan is also beneficial. Dust accumulation can cause numerous problems, particularly with appliances and plumbing. Ensuring regular cleaning can not only maintain aesthetics but also enhance performance and functionality. For example, clearing debris from gutters, fixing squeaky doors by applying lubricant, and ensuring dry and clean surfaces can prevent potential water damage later on.

    Moreover, developing a seasonal maintenance schedule can be incredibly advantageous. During winter, for example, checking for drafts around windows and doors helps maintain energy efficiency, while summer might be the right time for checking outdoor walls and landscaping. By staying proactive and dedicated to these simple yet effective easy DIY maintenance tasks, homeowners can significantly reduce the frequency of repairs and foster a more pleasant living environment. This small investment of time can lead to a host of long-term benefits for any homeowner.

    Conclusion: Empowering Your DIY Skills

    Homeowners are often faced with various maintenance challenges that can deter them from fully enjoying their living environments. However, embracing easy DIY maintenance can lead to not only a more comfortable home but also newfound confidence in tackling common issues. Simple tasks such as fixing squeaky doors, repairing loose tiles, or engaging in other home repairs under 30 minutes may seem daunting at first, but they are entirely manageable with the right approach and mindset.

    By learning to fix squeaky doors, you not only eliminate annoying sounds but also enhance the overall functionality of your home. Similarly, knowing how to repair loose tiles can prevent more extensive and costly repairs down the line, ensuring that your living space remains both safe and aesthetically pleasing. These small projects can usually be completed quickly, making them an ideal introduction to DIY maintenance for anyone, regardless of skill level.

    Engaging in these simple repairs offers numerous benefits, including saving money that would otherwise be spent on professional services. Furthermore, each successfully completed task builds your DIY skill set, empowering you to take on larger projects in the future. Maintenance becomes less of a chore and more of an enjoyable part of homeownership, fostering a sense of achievement every time a project is finished.

    Ultimately, approaching home maintenance as an ongoing journey rather than isolated tasks can significantly enhance your living environment. As you continue to develop your DIY skills, you will likely discover that many repairs and improvements are well within your ability to manage. Start with these simple fixes, and over time, you will cultivate a home that reflects not just your style but also your prowess as a capable DIYer.

  • Maximize Your Culinary Space: Organizing a Small Kitchen for Efficiency

    Maximize Your Culinary Space: Organizing a Small Kitchen for Efficiency

    Understanding the Importance of Organization in a Small Kitchen

    In any kitchen, the ultimate goal is to create an efficient workspace that fosters a pleasant cooking experience. However, in small kitchens, achieving this goal often presents unique challenges. Limited storage and workspace can hinder the ability to maintain an organized environment, making it crucial to adopt effective small kitchen organization strategies. The significance of organization within a compact culinary space cannot be overstated, as it directly impacts cooking efficiency and overall functionality.

    When kitchen tools and ingredients are well-organized and easily accessible, cooking becomes more streamlined and enjoyable. In a small kitchen, every inch of space counts; therefore, an organized layout can significantly enhance kitchen efficiency. For instance, grouping similar items together, utilizing vertical storage solutions, and keeping frequently used utensils within reach can save time during meal prep. This organization not only allows for smoother cooking experiences but also reduces frustration, enabling one to focus on creativity in the kitchen.

    Moreover, a well-organized kitchen contributes to a more pleasant cooking environment. Clutter can quickly breed stress, making the act of preparing meals feel cumbersome instead of enjoyable. By implementing effective organization techniques, such as investing in multi-functional furniture or using clear storage containers, individuals can create a space that is both functional and inviting. Consistently maintaining this organization can uplift the entire ambiance of the kitchen, making it a true focal point of the home.

    In small kitchens, where space limitations pose constant challenges, a thoughtful approach to small kitchen organization is essential. Not only does it address practical issues, but it also enhances the quality of time spent cooking, ultimately making it a more satisfying experience. Implementing strategic kitchen efficiency tips is vital for maximizing the potential of any compact culinary area, and the right organizational methods can transform a seemingly cramped kitchen into a model of efficiency.

    Assessing Your Space: Measuring and Analyzing Kitchen Dimensions

    To effectively organize a small kitchen, the first step is to measure and analyze your space. Accurate measurements are essential as they lay the groundwork for efficient kitchen organization. Start by determining the dimensions of your countertops, cabinets, and appliances. Use a tape measure to get precise lengths and widths, taking note of any irregularities in your kitchen layout that might affect optimal organization.

    Beyond mere measurements, visualizing your kitchen layout is crucial. Create a rough sketch of your existing setup, including the placement of major elements such as the sink, stove, and refrigerator. This will help you identify key areas that require attention. Consider how the current arrangement supports or hinders kitchen efficiency. For instance, if the distance between your preparing station and cooking area is too great, it may be time to rethink the layout for improved workflow.

    Understanding traffic flow in your small kitchen is another essential aspect. Analyze how you and others move around the space during meal preparation and cleanup. There should be clear pathways to avoid congestion, particularly in smaller areas where space is limited. Ideally, the kitchen should have designated work zones, such as cooking, prepping, and cleaning, to facilitate smooth transitions between tasks. This organization not only enhances productivity but also makes the space feel more functional.

    Lastly, once you have your measurements and layout visualized, prioritize your kitchen organization efforts. Focus on the areas that are most frequently used or that cause frustration. By taking the time to measure and analyze your kitchen dimensions, you set the stage for creating a more efficient, organized small kitchen that meets your cooking needs.

    Decluttering: The First Step to an Efficient Kitchen

    In the pursuit of small kitchen organization, the initial and perhaps most crucial step is decluttering. A well-planned decluttering process serves as the foundation for improving kitchen efficiency. This entails thoroughly assessing every item in your kitchen, from pots and pans to utensils and gadgets. The first action is to empty cabinets and drawers to gain a clear understanding of what you own.

    Once everything is laid out, categorize your items into three distinct groups: keep, donate, and discard. It is essential to be objective during this process. Evaluate the frequency of use for each item, prioritizing those that serve everyday needs. For instance, if a particular appliance has remained untouched for the past year, it may be time to consider donating or discarding it. This approach not only clears physical space but also clarifies which tools are essential for preparing meals efficiently.

    In a small kitchen, where every square inch is valuable, this type of intentional decision-making can significantly enhance functionality. As you parse through your items, consider how each piece contributes to your cooking routine. Items that are frequently used, such as pots, knives, and dishes, should be easily accessible, while seldom-used gadgets may be stored away in less-prime locations or eliminated altogether.

    It’s also advisable to employ organizers, such as drawer dividers or storage bins, for the items you choose to keep. This will not only streamline the organization process but also contribute to maintaining a clutter-free environment in the future. Proper small kitchen organization through strategic decluttering sets the stage for an efficient kitchen where functionality flourishes.

    Maximizing Vertical Space: Using Walls and Cabinets Wisely

    In the quest for effective small kitchen organization, leveraging vertical space is one of the most impactful strategies. This approach ensures that every inch of the kitchen is utilized, thus enhancing kitchen efficiency. Utilizing walls and cabinets can transform a cramped cooking area into a multifunctional space, facilitating easy access to essential items while keeping the floor area free from clutter.

    One popular method for maximizing vertical space is hanging pots and pans. By installing a pot rack or using wall-mounted hooks, homeowners can free up precious cabinet space while showcasing their culinary tools. This not only aids in organization but also adds a decorative element to the kitchen. Moreover, pots and pans are often heavy and cumbersome; having them hung at eye level allows for easier retrieval without the hassle of rummaging through lower cabinets.

    Another effective solution involves the installation of shelves. Floating shelves can be placed above countertops or kitchen islands to store and display items like cookbooks, spices, and decorative dishware, while also optimizing vertical space. For smaller kitchens, open shelving can create an illusion of space, making the room feel more open and airy. In addition, consider utilizing the backs of cabinet doors for added organization. Adhesive hooks or small racks can hold items like measuring spoons, oven mitts, or even spices, efficiently maximizing these otherwise unused areas.

    Innovative storage solutions such as pegboards or wall-mounted racks also contribute significantly to small kitchen organization. These versatile options can accommodate various kitchen essentials, including utensils, gadgets, and herbs. By employing these strategies, one can greatly enhance kitchen efficiency, making small kitchens not only functional but also enjoyable spaces in which to cook and gather.

    Smart Storage Solutions: Utilizing Drawers, Bins, and Containers

    In a small kitchen, maximizing space is essential to maintain organization and enhance efficiency. One of the most effective ways to achieve this is through smart storage solutions, which include drawer dividers, stackable bins, and transparent containers.

    Drawer dividers can be a game changer for organizing utensils and kitchen tools. By using customizable dividers, you can neatly separate items like forks, spoons, knives, and measuring spoons. This prevents clutter and makes it easier to find what you need quickly. Not only does this contribute to improved kitchen efficiency, but it also helps maintain a visually appealing space.

    Stackable bins are another innovative storage option for small kitchens. These bins can hold an array of pantry items, from dry goods to snacks, while making use of vertical space. Positioning these bins in hard-to-reach cabinets or on countertops can help you customize your small kitchen organization. For maximum efficiency, label each bin to ensure you can locate items easily. This approach transforms chaotic pantry shelves into a well-ordered, functional area.

    Clear containers are particularly useful for organizing spices and small ingredients. Having labeled, see-through containers allows for easy visibility of contents. This minimizes the time spent searching for specific items while cooking. Moreover, it helps prevent purchasing duplicate items, thus saving both money and storage space.

    Integrating these smart storage solutions into your small kitchen can significantly enhance efficiency and accessibility. By thoughtfully using drawer dividers, stackable bins, and clear containers, you can create a system that reduces clutter and optimizes your culinary space. This not only streamlines your cooking process but also fosters a pleasant cooking environment, making small kitchen organization an achievable and practical goal.

    Creating Zones: Organizing for Activity Efficiency

    Effective small kitchen organization hinges on the principle of zoning, which involves designating specific areas for distinct culinary activities. By creating these zones, homeowners can significantly enhance kitchen efficiency. The primary zones typically include cooking, prep work, and cleaning. Each zone should be tailored to streamline tasks and ensure that everything needed for each activity is within arm’s reach.

    To establish a cooking zone, position the stove, oven, and necessary cooking utensils in close proximity. This could involve installing pot racks above the stovetop or using drawer organizers for easy access to spatulas and ladles. For a prep work zone, consider placing cutting boards, knives, and mixing bowls together, possibly near a countertop appliance like a food processor. A well-organized prep area is essential for decluttering workspace, allowing for rapid meal preparation to maximize efficiency.

    The cleaning zone is just as critical, incorporating the sink, dish soap, and drying rack. By keeping everything needed for cleaning in one area, you can streamline the post-cooking process, which enhances the overall functionality of the small kitchen. It’s also advisable to group similar items together, such as storing pots and pans near the stove, while keeping baking sheets and mixing tools close to the prep area. This thoughtful organization not only saves time but also minimizes movement, which is particularly beneficial in compact spaces.

    In diverse small kitchen formats, from galley designs to L-shaped layouts, these zoning principles can be effectively implemented. For instance, in a galley kitchen, the narrow space can be optimized by aligning the cooking and prep zones along one wall. Meanwhile, in an L-shaped kitchen, the corners can be utilized for storage and preparation, allowing for a smooth workflow. Ultimately, with careful attention to organizing zones, any small kitchen can function efficiently and accommodate multiple culinary tasks seamlessly.

    The Role of Lighting: Enhancing Functionality and Ambiance

    Proper lighting plays a crucial role in maximizing the functionality and aesthetic appeal of a small kitchen. When space is limited, strategic lighting choices not only illuminate essential work areas but also create an inviting atmosphere that enhances the overall culinary experience. Effective small kitchen organization is intertwined with appropriate lighting solutions, directly impacting both efficiency and ambiance.

    In a small kitchen, layering lighting is key to achieving optimal brightness and visual dynamics. Ambient lighting serves as the general light source, filling the space with illumination. This can be accomplished through ceiling-mounted fixtures or recessed lighting, ensuring that all areas are adequately lit. Task lighting, on the other hand, focuses on specific work zones, such as countertops, stovetops, and sinks. Under-cabinet lighting or pendant lights above an island can provide the necessary brightness to aid food preparation and cooking, thus enhancing kitchen efficiency.

    Additionally, accents such as decorative light fixtures or wall sconces can draw attention to design elements and personal touches, making the space appear more expansive and inviting. The use of adjustable or dimmable lights is also beneficial, allowing homeowners to customize the ambiance based on the time of day or occasion. Furthermore, light colors on walls and cabinetry can reflect light effectively, creating an illusion of a larger space. This is an essential aspect of organizing a small kitchen, as it helps to maintain a sense of openness.

    To achieve a harmonious blend of functionality and style, consider combining multiple lighting sources within the kitchen. This approach not only enhances practicality but also emphasizes individual design features, reinforcing the importance of light in small kitchen organization. An efficient kitchen space that feels larger and is well-lit significantly improves the culinary experience, making it a vital component of kitchen planning.

    Designing a Multi-Functional Kitchen Layout

    When it comes to small kitchen organization, the layout plays a crucial role in maximizing both space and functionality. Various kitchen designs cater to limited dimensions while enhancing efficiency. Among the common styles, U-shaped, L-shaped, and galley kitchens stand out as optimal choices for tighter spaces. Each layout offers unique advantages that contribute to creating an organized environment.

    The U-shaped kitchen is ideal for maximizing every corner of an area, utilizing three walls for cabinetry and appliances. This configuration promotes smooth workflow as it allows easy access to the stove, refrigerator, and sink, aligning well with kitchen efficiency tips. On the other hand, the L-shaped kitchen leverages two adjacent walls, leaving a central space open for movement, making it perfect for small kitchens requiring flexibility.

    In contrast, the galley kitchen’s linear design is excellent for narrow spaces, offering an efficient workflow between parallel counters. This layout is beneficial for those looking to organize a small kitchen without compromising on functionality. However, to enhance the usability of any design, incorporating mobile kitchen islands or foldable tables can provide extra counter space and dining versatility.

    Mobile kitchen islands can be maneuvered as needed, serving dual purposes for cooking and dining. Additionally, foldable tables can be conveniently tucked away when not in use, thereby freeing up floor space. These features foster a comfortable atmosphere where cooking and dining coexist seamlessly, addressing the need for efficient small kitchen organization.

    In conclusion, selecting the right layout is essential for organizing a small kitchen effectively. Whether choosing a U-shaped, L-shaped, or galley kitchen, incorporating movable furnishings can significantly enhance both comfort and efficiency. Emphasizing layout and flexibility contributes to a more organized and functional cooking space in a small kitchen.

    Maintaining Your Organized Kitchen: Tips for Longevity

    Once you have successfully implemented a small kitchen organization strategy, the next critical step is maintaining that organization to ensure lasting kitchen efficiency. An organized kitchen not only enhances functionality but also boosts your cooking experience. To achieve sustainability in your organized kitchen, it is essential to establish regular routines and habits.

    One significant habit to incorporate is the “one in, one out” rule. This principle states that for every new item introduced into your small kitchen, an existing item should be removed. This habit prevents clutter from accumulating and helps maintain a balanced environment. Additionally, scheduling regular clean-up sessions—perhaps weekly or monthly—will allow you to evaluate the current state of your kitchen and make necessary adjustments. During these sessions, take the time to declutter and reorganize kitchen items based on usage frequency and practicality.

    Seasonal decluttering can also contribute significantly to maintaining your kitchen’s organization. At least twice a year, review your kitchen essentials and assess their relevance to your current cooking habits. Items that have not been used in the past few months might be candidates for donation or storage elsewhere. This practice not only creates more space but ensures that your kitchen remains an efficient workspace tailored to your needs.

    As your culinary practices and lifestyle evolve, so too should the organization of your kitchen. Be flexible and willing to adapt; this may mean changing the arrangement of your supplies or reallocating countertop space as your cooking habits transform. By integrating these sustainable habits, you will preserve the organization of your small kitchen while ensuring that it remains an efficient space for your culinary pursuits. This consistent attention will allow you to enjoy a well-ordered kitchen and enhance your cooking experience.

  • DIY Accent Walls: From Peel-and-Stick to Painted Murals

    Introduction to Accent Walls

    Accent walls have emerged as a prominent trend in home decor, transforming ordinary spaces into visually captivating environments. An accent wall, sometimes referred to as a feature wall, serves to highlight specific areas of a room by contrasting with the other walls. This design technique enhances the aesthetic appeal of any space, allowing homeowners to express their unique style and creativity without the need for a complete renovation.

    The popularity of accent walls can be attributed to their ability to introduce color, texture, and depth into a room. Whether through painted murals or peel and stick options, accent wall ideas offer an array of choices for homeowners looking to make a statement. These walls can serve as a focal point, drawing attention to artwork, furniture, or architectural features. For instance, a bold color or an intricate pattern can elevate an otherwise bland interior, making it feel more inviting and personalized.

    In addition to visual appeal, accent walls provide an opportunity for flexibility in home styling. Homeowners can easily switch up their decor by changing the design elements of the accent wall. This adaptability is evident in the popularity of peel and stick accent wall options, which allow for easy application and removal, making them a practical choice for renters or those who prefer a non-permanent approach. Painted mural DIY projects are also gaining traction, as they offer a chance to bring art and personality into the home.

    Overall, the versatility of accent walls has made them a sought-after solution for enhancing interior spaces. By strategically choosing colors and patterns, individuals can create environments that resonate with their personal tastes, making accent walls an essential component of modern home design.

    Benefits of DIY Accent Walls

    DIY accent walls present an array of benefits, making them an increasingly popular choice among homeowners and renters alike. One of the most significant advantages is cost-effectiveness. Compared to hiring professional decorators, creating your own accent wall can significantly reduce expenses. Materials for a peel and stick accent wall or a simple painted mural DIY project can be sourced at affordable prices, allowing for creative freedom without financial strain.

    Additionally, engaging in DIY projects fosters a sense of personal creativity. Designing an accent wall allows individuals to express their unique style and preferences. Homeowners can select colors, patterns, and materials that resonate with their aesthetic, transforming their space into a personalized sanctuary. Whether one opts for bold geometric patterns or soft, natural hues, the possibilities are virtually endless. This level of customization enhances the satisfaction derived from home improvement, as every stroke of paint or peel and stick application reflects the homeowner’s vision.

    Moreover, opting for DIY accent walls provides flexibility in design choices. Homeowners can easily modify their designs according to evolving tastes or trends. If a particular style feels outdated or if a room requires a seasonal refresh, changing a DIY accent wall is a simple task. This adaptability is particularly beneficial for renters, who often face restrictions on permanent alterations. A temporary solution like a peel and stick accent wall can easily be removed when needed, making it an ideal choice for those who wish to personalize their living space without jeopardizing their security deposit.

    Ultimately, the benefits of DIY accent walls extend beyond mere aesthetics, presenting a unique combination of creativity, affordability, and flexibility that can enhance the allure of any home.

    Types of DIY Accent Walls

    Creating a DIY accent wall can transform the ambiance of a room, making it a focal point that reflects personal style. There are several types of DIY accent walls available to suit varying tastes and skill levels, each offering unique advantages.

    One popular option is peel-and-stick wallpaper. This innovative material allows for easy application and removal, making it an excellent choice for renters or those who frequently update their decor. Available in a plethora of patterns, colors, and textures, peel and stick accent walls provide an effortless way to introduce a new look without the mess of traditional wallpaper installation.

    Wood panels represent another distinctive choice for accent walls. Whether opting for reclaimed wood or new timber, planks can be arranged in various patterns to create a rustic or contemporary feel. Wood lends warmth to a space and is versatile enough to adapt to both traditional and modern decor styles. It can also be stained or painted to match your aesthetic preferences, making it a flexible option for DIY enthusiasts.

    Reclaimed materials offer an eco-friendly alternative for those interested in sustainable design. Salvaged barn wood, brick, or metal can be creatively combined to construct an accent wall that tells a story. The unique textures and colors inherent in these materials add character and depth, making reclaimed accent walls truly one-of-a-kind.

    Lastly, painted designs provide infinite possibilities for customizing your accent wall. From geometric patterns to intricate murals, the only limit is your creativity. For those with artistic skills, painted mural DIY projects can result in striking visual statements that elevate a room’s overall design.

    Each type of DIY accent wall presents opportunities for personal expression and transformation, allowing homeowners to curate a space that genuinely resonates with their aesthetic values.

    Getting Started: Tools and Materials Needed

    Creating a stunning DIY accent wall begins with the right tools and materials. Before embarking on any project, it’s fundamental to assess the type of accent wall you plan to implement, whether it be a peel and stick accent wall or a painted mural DIY. Each option requires different supplies, so let’s explore these essentials to ensure a smooth installation process.

    Firstly, accurate measurements are crucial for any accent wall project. Start by measuring the wall area you wish to cover, ensuring you know the height and width to obtain the correct quantity of materials. For peel and stick accent walls, you will need to calculate the amount of wallpaper or panels required based on the dimensions of your space.

    Next, focus on the adhesive. For peel and stick options, the adhesive is usually pre-attached. However, if you plan on using traditional wallpaper, invest in high-quality adhesive specifically designed for wallpaper to ensure a long-lasting bond. For painted murals, gather quality paint that suits your aesthetic vision, as well as a primer to create an even base.

    In terms of application, ensure you have the necessary tools, including brushes, rollers, and painter’s tape. Rollers can expedite the painting process for larger areas, while brushes are ideal for detailing and corners. Additionally, use painter’s tape to protect adjacent surfaces and provide clean lines for a professional finish.

    Lastly, consider any additional decorative items you might want to incorporate into your accent wall project, such as wall art, shelves, or lighting fixtures that complement the design. Sourcing quality materials is essential, so search for reputable suppliers and read reviews to ensure durability and aesthetic appeal. With a solid foundation of tools and materials, you will be well-prepared to create a captivating accent wall that enhances your space.

    Step-by-Step Guide to Peel-and-Stick Wallpaper

    Creating a stunning DIY accent wall using peel-and-stick wallpaper can be an enjoyable project that elevates your interior space. Before diving into the application process, preparation is key. Begin by selecting the wall you wish to transform and ensure it is clean, dry, and free from any dust or grease. If needed, patch up any holes or imperfections to achieve a smooth surface.

    Next, gather your tools and materials, which may include a level, measuring tape, utility knife, and a plastic smoothing tool. Measure the height and width of the wall and calculate the amount of peel-and-stick wallpaper required for your accent wall. It is advisable to purchase an additional roll in case of errors during installation.

    When you are ready to apply, start from one corner of the wall. Carefully peel back the backing of the wallpaper to expose the adhesive side. Align the top of the wallpaper with the ceiling or desired starting point, making sure the paper is straight using a level. Gently press the wallpaper onto the wall, smoothing it out with your plastic smoothing tool as you work your way down, minimizing air bubbles.

    If you encounter air bubbles, gently lift the wallpaper in that area and smooth it out again. For corners and edges, use a utility knife to trim excess wallpaper, ensuring clean lines for a professional finish. It is recommended to take your time during this process, as precision in alignment is essential for achieving a polished look.

    Once you have completed your peel-and-stick accent wall, step back to admire your handiwork. Enjoy the newfound style your DIY accent wall brings to the room, and don’t hesitate to explore different accent wall ideas for future projects. With the right approach, you can confidently create a beautiful space with minimal effort using peel-and-stick wallpaper.

    Creating a Painted Mural Accent Wall

    Creating a painted mural accent wall can transform an ordinary space into a captivating focal point. The first step in planning your mural design is to select a theme that resonates with your personal style and complements the overall decor of the room. Consider elements such as colors, imagery, and the mood you wish to establish. Researching various accent wall ideas online or in home design magazines can inspire you and help crystallize your vision.

    Once you have a clear idea, sketching the mural on paper before proceeding to the wall is advisable. This allows you to visualize proportions and adjust details. After finalizing your sketch, it’s essential to prepare the wall surface. Make sure to clean and prime the area to ensure that paint adheres well. You may opt for a light base coat that acts as a background for your mural, providing an even foundation for subsequent layers.

    When painting your mural, start with larger sections first, using broad strokes. A good technique for blending colors seamlessly involves using a dry brush or sponge to feather the edges between colors, creating a smooth gradient. This method is particularly effective when designing elements that require intricate color blending, such as skies or landscapes. For smaller details, use fine-tipped brushes to achieve precision.

    Do not rush the process; taking time to layer and build depth will enhance the visual impact of your painted mural. After the paint has dried, assess the mural for any touch-ups needed to finalize the look. Consider sealing your mural once it is complete with a clear protective finish to preserve your work. With thoughtful planning and execution, your painted mural accent wall will not only showcase your artistic skills but also elevate the aesthetic of your living space.

    Using Wood and Other Textures for a Unique Look

    Creating a captivating diy accent wall can significantly enhance the ambiance of any room. One effective approach is to incorporate wood and other textured materials, which can introduce warmth and sophistication. Various wood species, such as reclaimed wood, shiplap, or even plywood, can be utilized to achieve a rustic or contemporary aesthetic. Each type presents unique characteristics that can be employed to align with your design vision.

    For those considering wood, the first step is selecting the right material. Reclaimed wood, for instance, not only adds character but is also an eco-friendly option. Alternatively, shiplap can create a clean, modern look. Installation can often be approached as a peel and stick accent wall project if you use manufactured wood panels, providing an easy, cost-effective solution. Measure your wall space carefully before applying any adhesive, ensuring that each piece fits snugly and aligns properly.

    In addition to wood, incorporating textiles or fabric can further diversify the tactile qualities of your accent wall. This method involves attaching fabric to a plywood base, allowing for easy installation and removal. Consider using bold patterns or colors to create visual interest or opt for neutral-toned fabrics to maintain a subtle elegance. Regardless of the choice, ensure the fabric is tightly secured and maintain its appearance with periodic cleaning.

    Maintaining textured walls is essential for longevity. Regular dusting and occasional deep cleaning will help preserve the integrity of the materials. Moreover, if you choose to create a painted mural diy, ensure that the paint is suitable for such applications and is compatible with the surface beneath. By carefully choosing materials and techniques, you can successfully achieve a unique and engaging accent wall that stands out.

    Incorporating Personal Style and Creativity

    Creating a DIY accent wall can be an exciting opportunity to express personal style and enhance the overall ambiance of a space. The journey begins with identifying a theme that resonates with the homeowner’s personality, whether it’s modern, rustic, bohemian, or minimalist. Selecting wall treatments that reflect these themes will significantly contribute to the final aesthetic.

    One of the critical aspects of your DIY accent wall is the choice of colors. Colors not only set the mood of a room but also reflect the emotions and vibes one wishes to convey. For instance, warm tones such as reds and oranges can stimulate energy, while cool blues and greens can evoke calmness. Incorporating contrasting colors can also create a striking visual appeal when paired with neutral tones, making the accent wall a focal point in the room.

    Patterns play a pivotal role in accent wall designs and can bring depth and character to spaces. The use of geometric patterns is a popular option for a contemporary look, while floral or nature-inspired designs might complement an organic theme. Those considering a more temporary method might explore peel and stick accent wall options, which enable easy experimentation without long-term commitment. Additionally, having the right balance between patterns and existing decor is crucial; you want the accent wall to enhance the space, not overwhelm it.

    Inspiration for designs can come from various sources, such as artwork or elements found in nature. For example, a painted mural DIY can reflect a favorite landscape or scene that resonates with the homeowner. Ultimately, your accent wall should align with the overall décor, creating a harmonious blend that reflects individual style. Fostering creativity in these projects can lead to truly personalized spaces that are both inviting and aesthetically pleasing.

    Maintaining Your DIY Accent Wall

    Creating a stunning DIY accent wall, whether through a peel and stick method or a painted mural project, adds depth and character to any living space. However, to ensure that your accent wall remains vibrant and appealing over time, maintenance is essential. Proper care involves not just cleaning but also making necessary repairs and refreshing the design as needed.

    Regular cleaning is the first step in maintaining the beauty of your accent wall. For walls with peel and stick materials, use a soft, damp cloth to gently wipe away any dust or grime. It is important to avoid abrasive cleaners or scrubbing pads, as these may damage the adhesive properties of the wall covering. If your accent wall features a painted mural, a gentle soap solution and microfiber cloth can effectively remove stains without harming the paint finish. Always test cleaning solutions on a small, inconspicuous area before applying them broadly to ensure they do not negatively affect the surface.

    Repairing any damages promptly is crucial for preserving the aesthetic of your accent wall. For peel and stick accent walls, if a section begins to peel, carefully lift it and reapply the adhesive. If there is any damage to paint, touching up can often be done with a small brush and matching color. For larger issues, such as deep scratches or chips, consider repainting the affected area or, if necessary, an entire panel. This process can be particularly effective in maintaining a clean and uniform look over time.

    To keep your DIY accent wall fresh, consider changing elements periodically. This might include swapping decor items that complement the wall or even re-painting if the wall begins to look dull. Implementing new accent wall ideas will not only rejuvenate the space but also reflect your evolving taste and style. Thus, ongoing maintenance is key to enjoying the beauty and functionality of your DIY accent wall.

  • Paint Colors That Make Small Spaces Look Bigger: Visual Tricks and Shade Suggestions

    Understanding the Psychology of Color

    Colors play a fundamental role in shaping our perceptions and emotions, particularly in the realm of interior design. Understanding the psychology of color is crucial when choosing paint colors for small spaces, as the right hues can create illusions of spaciousness or confinement. Lighter colors, such as whites, soft pastels, and pale neutrals, tend to promote an airy and open atmosphere, making them ideal for small rooms. These shades reflect natural light and enhance the sense of space, which can make small rooms look bigger.

    On the other hand, darker colors can have the opposite effect. While rich and bold hues can certainly add drama and sophistication, they can also create a sense of enclosure, making a space feel more cramped. For this reason, it is essential to consider the psychological impacts of color when selecting small space paint ideas. For example, deep navy or charcoal might provide elegance, but they can also overwhelm a limited area when used excessively.

    Moreover, understanding color temperature is vital when designing small spaces. Warm colors—such as reds, oranges, and yellows—tend to draw attention closer and can add warmth. In contrast, cool colors like blues and greens can produce a sense of calm and serenity while visually expanding the area. Thus, when aiming to enhance the perceived volume of a room, cooler shades may be the best choice among the best colors for small rooms.

    In summary, the psychology of color is integral to making informed decisions about paint colors for small spaces. By carefully selecting lighter shades and understanding the differentiation between warm and cool tones, one can effectively manipulate the visual dynamics of confined areas and create environments that feel generously spacious.

    The Magic of Light Colors

    When it comes to making small rooms look bigger, the choice of paint colors plays a crucial role. Light colors, in particular, have the remarkable ability to enhance the feeling of spaciousness while reflecting light effectively. Utilizing shades such as soft whites, pale blues, and gentle beiges can create an airy atmosphere that is essential in small spaces.

    Soft whites are a popular choice for small room paint ideas. They reflect natural light beautifully, which contributes to the illusion of a larger area. By opting for a crisp white with a hint of warmth or coolness, one can create a fresh canvas that opens up the room. This neutral backdrop allows for the incorporation of other colors and decor elements without overwhelming the space, making it one of the best colors for small rooms.

    Pale blues also offer a soothing alternative, as this hue evokes a sense of calm while maintaining a light appearance. It’s known for its ability to make spaces feel more expansive. When applied to walls, pale blue shades invite a subtle reflection of light, further contributing to the perception of a bigger room. This makes it a favored choice for various styles, from modern to coastal design themes.

    Gentle beiges serve as another versatile option that blends well with various decor styles. Warm beige tones can enhance the cozy feel of a room while still keeping the space feeling light and open. These shades deftly balance warmth and lightness, which is essential for creating visually appealing small spaces. In sum, integrating light colors such as soft whites, pale blues, and gentle beiges can significantly transform how we perceive space within small rooms, ultimately making them feel larger and more welcoming.

    The Role of Accent Walls

    Accent walls can significantly contribute to the perception of space, particularly in small areas where every inch counts. When selecting paint colors for small spaces, the choice of a soft hue for your accent wall can create an illusion of depth without overwhelming the existing decor. Light colors, such as soft pastels or muted earth tones, can enhance the airy feeling in a confined area while still adding a focal point.

    Strategic placement of an accent wall is equally essential for achieving the desired effect. Ideally, the accent wall should be positioned opposite the primary entrance to the room, drawing the eye inward and creating a sense of depth. For instance, in a small living room, painting the wall behind the sofa in a gentle hue can invite visual interest without closing off the space. Room layout also plays a vital role; a narrow room may benefit from an accent wall that extends the length, helping to make small rooms look bigger.

    Texture and finish can further enhance the aesthetic of an accent wall. By using different paint finishes like satin or eggshell, you can reflect light effectively, adding dimension to your wall. Incorporating materials such as wood or brick can introduce tactile interest and contrast against smoother surfaces, thus enriching the overall ambiance. When considering small space paint ideas, think about how textures interplay with colors. For instance, a subtle matte finish could add sophistication, while a glossy finish could energize a space, depending on the look you are aiming for.

    In the end, the choice of an accent wall should holistically consider aspects such as room layout, lighting, and the best colors for small rooms, ensuring that it contributes effectively to an illusion of space while being aesthetically pleasing. Careful planning in this area can turn any compact room into a visually inviting environment.

    Incorporating Monochromatic Schemes

    Using a monochromatic color scheme is a highly effective method for making small spaces look bigger. By selecting varying shades of a single hue, you create a cohesive and unified environment that elevates the room’s overall aesthetic while fostering a sense of clarity and openness. This approach minimizes visual distractions, which can often make spaces feel cluttered or constricted, ultimately enhancing the perception of space.

    One of the primary benefits of adopting monochromatic paint colors for small spaces is the sophisticated ambiance it generates. For instance, using different shades of blue—ranging from soft sky blue to deep navy—can add depth without overwhelming the space. Such gradations draw the eye naturally across the room, making it feel expansive and well-planned. This makes it one of the best colors for small rooms, as hues within the same palette resonate harmoniously, fostering a feeling of tranquility.

    To prevent a flat appearance, it’s essential to layer textures within your chosen monochromatic scheme. Consider incorporating a variety of materials, such as a plush rug, linen curtains, or leather furniture, in the same color family. This strategy not only preserves the visual interest but also emphasizes the sophistication of the color palette you are working with. For example, if the base color is a pale grey, you might choose to add darker grey cushions, a textured throw, and metallic accents to create dimension and warmth within the small room.

    In conclusion, implementing a monochromatic scheme can significantly enhance the perception of space in small areas. By carefully selecting varying shades of a single color and layering textures, homeowners can achieve a stylish and inviting atmosphere that makes small rooms appear larger and more cohesive.

    Using Cool Colors to Open Up Spaces

    Cool colors, including shades of blue and green, have long been associated with feelings of tranquility and spaciousness. These hues can effectively create an illusion that makes small spaces feel larger than they actually are. By opting for these calming tones, homeowners can transform their small rooms into inviting and airy sanctuaries. When considering paint colors for small spaces, it is essential to evaluate how different shades influence the perception of room size.

    In the realm of small space paint ideas, light blues are particularly adept at creating the feeling of a more expansive environment. For example, a soft sky blue can foster a serene main color in a living room or a bedroom, while also reflecting natural light. This not only enhances the ambiance but also makes the walls visually recede. Additionally, shades like aqua or teal can inject personality and vibrance while maintaining the spacious effect.

    Greens, particularly lighter shades such as mint or sage, also contribute to making small rooms look bigger. These colors evoke a sense of nature, providing a refreshing backdrop for various decor styles. In kitchens, a pale green can complement wooden cabinets and natural light, creating an open atmosphere that still feels cozy.

    When considering how to implement these shades, bathrooms can benefit from cool colors as well—light aqua or soft turquoise can lend a spa-like quality that enhances relaxation. Furthermore, these hues can be paired with white trim or fixtures to amplify the overall lightness of the space.

    Overall, utilizing cool colors effectively can open up small spaces and elevate the overall aesthetic. By selecting shades thoughtfully based on room function and personal style, homeowners can achieve a balanced decor that enhances both space and comfort.

    Strategies for Using Dark Colors Wisely

    In the realm of interior design, the application of dark paint colors in small spaces can lead to striking visual effects when executed with care. Contrary to popular belief, employing darker shades does not inherently shrink a room; instead, they can create a rich, inviting atmosphere that enhances the overall appeal of a cozy environment. The key lies in the strategic use of these hues, particularly in well-lit areas where natural light can mitigate potential gloominess.

    When considering paint colors for small spaces, dark shades should be thoughtfully chosen to accentuate specific features of the room. For example, painting an accent wall in a deep navy or charcoal can draw the eye, highlighting architectural details or providing a stunning backdrop for artwork. This technique not only diversifies the color palette but also adds depth to the room, making it feel more open and sophisticated.

    To effectively balance the intensity of darker colors, it is crucial to incorporate lighter hues within the same space. A combination of dark and light colors can prevent the room from feeling overwhelmingly confined. For instance, pairing a deep emerald green with crisp white trims can soften the overall effect and create a harmonious atmosphere. Additionally, integrating light-colored furniture and decor can further enhance the illusion of space in small rooms, allowing the darker elements to serve as accentuating features rather than dominant forces.

    Moreover, utilizing shiny finishes or reflective materials can amplify the light in the room, providing contrast to the darker tones while giving the illusion of an airier environment. Utilizing mirrors strategically can also enhance this effect, creating the perception of depth, thereby making small rooms look bigger. Overall, the key to using dark colors wisely in small spaces lies in finding the right balance and ensuring that these bold choices contribute positively to the overall design. By integrating these thoughtful strategies, one can achieve captivating and dynamic small space paint ideas that maximize both comfort and style.

    The Power of Neutrals and Earth Tones

    When it comes to selecting paint colors for small spaces, neutrals and earth tones play a vital role in making rooms feel larger and more open. These shades can create a calm and continuous flow, which is essential for maximizing the perception of space. Colors such as taupe, soft gray, and warm white are particularly effective choices for achieving this objective, as they promote a serene environment that enhances the overall ambiance of a small area.

    Taupe, for instance, is a versatile hue that combines gray and brown, offering warmth without overwhelming the senses. This makes it an ideal choice for small spaces, where comfort and style need to coexist. Soft gray, another popular option, brings a contemporary flair while maintaining a light and airy feel. Its ability to reflect natural light further contributes to its effectiveness in making small rooms look bigger.

    Warm whites, on the other hand, provide a crisp and clean backdrop that can seamlessly blend with various décor styles, from traditional to modern. Utilizing these shades can create a unified look throughout the space, thereby reducing visual clutter and encouraging a more spacious perception. Furthermore, these neutral colors are easy to accessorize, allowing for a wide range of accent pieces to shine without clashing with the wall color.

    It is also crucial to consider the influence of natural light when selecting paint colors for small rooms. The degree of sunlight a room receives can dramatically affect how colors appear, thus influencing their impact on space perception. Lighter tones tend to thrive in well-lit areas, enhancing the room’s openness, while darker earth tones may lend a cozy feeling but can also make a space seem confined if not balanced correctly. Overall, incorporating neutral and earth tones into your small space can be a strategic way to enhance its size and aesthetic appeal.

    Creative Techniques: Ombre and Stripes

    When it comes to transforming small rooms into visually appealing spaces, utilizing creative painting techniques can significantly enhance the overall effect. Two of the most popular methods are ombre effects and vertical stripes, both of which can create the illusion of depth and height in your space. These techniques can effectively complement paint colors for small spaces, enhancing the atmosphere and feel of the room.

    The ombre technique involves a gradual transition between two or more colors, blending them seamlessly from one shade to another. This gradual shift can provide an ethereal and expansive feeling, especially when transitioning from lighter shades at the bottom to darker hues at the top. For example, consider starting with a soft pastel at the base, gradually moving to a more pronounced color at the ceiling. The best colors for small rooms typically involve lighter shades, which can be combined with bolder colors to create a visually stimulating experience without overwhelming the space.

    Vertical stripes are another successful technique that can manipulate the perception of height in small spaces. By painting stripes that run from floor to ceiling, you can draw the eye upward, making the room appear taller. For a more understated look, opt for thin stripes in complementary colors. Conversely, broader stripes can serve as a bold statement. To execute this technique effectively, select a dominant color that resonates throughout the room, and then introduce either a suitable contrasting tone or a subtle shade that aligns with your overall palette.

    Combining these techniques with strategic color choices can help you effectively make small rooms look bigger. By considering the impact of your selected paint colors for small spaces and incorporating ombre or stripe patterns, you can transform a constricted area into an inviting and spacious environment.

    Finishing Touches: Artwork and Decor

    Selecting the appropriate artwork and décor is crucial in maximizing the visual impact of small rooms, especially when paired with well-chosen paint colors for small spaces. When it comes to enhancing the perception of space, lighter frames and delicate artwork can complement the shades of your walls and contribute to an airy atmosphere. Art in soft colors or monochromatic tones often aligns well with lighter paint options, creating a seamless flow that avoids feeling cramped.

    Moreover, mirrors serve as an effective tool in small spaces. When strategically placed, mirrors can reflect light and create an illusion of depth. This trick can significantly enhance how small rooms look bigger. Choosing a frame that aligns with the paint colors in your space—be it a sleek light wood or a subtle metallic—can make a cohesive design statement while amplifying the effects of the paint job.

    The concept of open shelving is also worthy of consideration in small space paint ideas. Instead of bulky furniture, choosing slim, wall-mounted shelves can promote a sense of openness. With these shelves, you have the freedom to display decorative items that harmonize with your selected wall colors. Consider integrating a mix of textures and colors that either contrast with or complement your paint colors, adding visual interest while keeping the space feeling expansive.

    Incorporating these finishing touches thoughtfully can enhance your décor and the overall ambiance of your small rooms. The combination of strategic artwork placements, light frames, mirrors, and open shelving can create an uplifting environment that supports the effects of your chosen paint colors. Ultimately, it is these nuanced details that play a pivotal role in achieving the best colors for small rooms, allowing them to thrive beyond their square footage.

  • How to Build a Floating Shelf: A Step-by-Step Guide for Beginners

    Introduction to Floating Shelves

    Floating shelves are an innovative and stylish storage solution that can enhance the aesthetics of any room. Unlike traditional shelving, floating shelves are mounted directly to the wall, creating the illusion that they are “floating.” This design choice not only adds a modern touch to home decor but also provides a versatile organizational system without the need for bulky furniture. Their minimalist appearance makes them ideal for a variety of spaces, from living rooms to kitchens.

    The benefits of floating shelves extend beyond their visual appeal. One of the most significant advantages is their space-saving nature. In smaller rooms, where floor space is limited, floating shelves allow homeowners to utilize vertical space effectively. This enables the display of decorative items, books, or plants without encroaching on the limited floor area. As a result, they can contribute to a more open and airy feel within the room.

    Building your own floating shelves is an excellent DIY project for beginners. Not only does it provide a sense of accomplishment, but it also allows for customization according to personal style and needs. Common materials such as wood, metal, and glass can be utilized, and the design can range from simple and sleek to more decorative options that fit various decor styles. Moreover, the process of crafting floating shelves can be a fun and rewarding way to engage with the home improvement aspect of your living space.

    In exploring how to build a floating shelf, you will learn the essential skills needed for this project, as well as appreciate the numerous design possibilities that floating shelves can offer. With proper guidance, anyone can create functional and aesthetically pleasing shelving solutions that elevate their home’s decor.

    Materials and Tools Needed

    To successfully build a floating shelf, it is crucial to gather all necessary materials and tools prior to the commencement of the project. First and foremost, select a suitable type of wood. Common options include plywood, hardwood, and pine, each offering varying aesthetics and durability. Plywood is often favored for its strength and even surface, while hardwood provides a premium look if budget allows. For those seeking a more cost-effective route, pine is widely available and easy to work with.

    Next, brackets play a vital role in supporting the floating shelf securely. Choose strong, concealed brackets designed specifically for floating shelves, as these will provide the necessary support while maintaining a clean appearance. It is also essential to gather screws, which will be needed to fasten the brackets to the wall securely. If possible, select screws that are appropriate for both the brackets and the type of wall material, whether it be drywall or concrete.

    In terms of tools, a power drill is indispensable for creating pilot holes and driving screws. Be sure to use a drill bit that corresponds to the screw size to avoid any difficulties during assembly. Additionally, a level is necessary to ensure that your shelf is installed straight, as an unlevel shelf may detract from its overall look and functionality. A measuring tape will also be essential for accurate measurements when positioning brackets and determining shelf length.

    Optional tools include a stud finder, which simplifies locating wall studs and enhances the stability of the shelf. A saw may also be necessary if you intend to customize the shelf dimensions. With these materials and tools assembled, you will be well-prepared to embark on your floating shelf project.

    Choosing the Right Location

    When it comes to installing a floating shelf, selecting the right location is paramount for both functionality and aesthetic appeal. One of the first considerations should be the wall material. Different wall types, such as drywall, plaster, or brick, have varying levels of weight capacity, which directly impacts how much weight the shelf can safely hold. Ensure the shelf is anchored securely to a stud or appropriate mount to support intended items.

    Another critical factor to consider is height. The floating shelf should be positioned at a height that allows for easy access while also complementing the overall design of the room. For instance, if the shelf will hold books, it should be at a level that’s comfortable for reading or reaching without strain. Alternatively, decorative items might be better suited for higher placements, providing visual interest without cluttering surfaces.

    Aesthetic alignment with existing décor is also essential. The color, material, and design of the floating shelf should harmonize with other elements in the room, such as furniture, art, and lighting fixtures. This creates a cohesive look that enhances the overall ambiance of the space.

    Additionally, it is crucial to avoid placing the shelf near electrical outlets, plumbing pipes, or other potential obstructions that could complicate installation or pose safety hazards. Checking for these elements beforehand not only secures an efficient installation process but also helps maintain the integrity of the items placed on the shelf. By thoughtfully considering these factors, you can select a location for your floating shelf that is both functional and visually appealing.

    Measuring and Marking the Wall

    When embarking on the project of building a floating shelf, accurate measurements are crucial to ensure a secure and aesthetically pleasing installation. The first step is to determine the desired height for the shelf. This decision should take into consideration the items that will rest on the shelf and the overall design of the space. A general rule of thumb is to install shelves at eye level or higher, avoiding interference with existing furniture or decor. Once the height is established, use a measuring tape to measure the distance from the floor or the nearest surface to the proposed location of the shelf.

    After determining the correct height, the next step involves marking the wall. It is essential to use a level to ensure that the shelf will be straight once installed. Begin by making a small mark on the wall at the height you have chosen. Then, using the level, extend a horizontal line across the wall. This line will serve as a reference point for attaching the brackets or supports of the floating shelf. Taking time to verify that the line is level prevents unnecessary adjustments later.

    Moreover, when marking for multiple shelves, utilize a measuring tape to ensure even spacing between each shelf. A typical spacing range is between 12 to 16 inches, but this can vary according to personal preference and the size of the items. Properly marking the wall not only aids in the installation of the shelf but also ensures that it is secured to the studs or appropriate wall support for maximum stability. If unsure about stud placement, a stud finder can be a valuable tool to identify the best locations for mounting.

    Preparing the Shelf: Cutting and Finishing

    The preparation of your floating shelf starts with selecting the right type of wood, which will affect the overall look and durability of the final product. Begin by measuring the length and width of the space where you plan to install the shelf. This will help ensure that the wood you cut is sized appropriately for your location. Utilize a straight edge and a pencil to mark your wood accurately.

    Once your measurements are marked, it’s time to cut the wood. Depending on the thickness of the wood and the tools available, you can use a handsaw, circular saw, or miter saw for this task. Ensure you are wearing safety goggles and a dust mask to protect yourself during the cutting process. If you are new to using power tools, take the time to familiarize yourself with their operation, and always follow the manufacturer’s safety guidelines. Make sure the wood is secured properly to prevent any accidents while cutting.

    After cutting the wood to size, the next step is sanding. Start with a coarser grit sandpaper, such as 80 or 100 grit, to smooth out any rough edges left from the saw. Progressively move to a finer grit, like 220 grit, to achieve a smooth finish. This not only enhances the visual appeal but also prepares the surface for finishing. Proper sanding helps eliminate any splinters and ensures a uniform surface for staining or painting.

    When it comes to finishing your floating shelf, there are several options available, including stains, paints, or protective coatings. Stains can accent the natural wood grain, while paint allows for a more colorful or modern appearance. Additionally, applying a protective clear coat helps extend the shelf’s life by shielding it from moisture and wear. Whichever route you choose, make sure to follow the product instructions carefully for the best results. Properly preparing your shelf will not only enhance its aesthetic but also ensure a sturdy and durable finished product.

    Mounting the Brackets

    To begin mounting your floating shelf, it is crucial to securely attach the brackets to the wall. The first step involves determining the location where your shelf will be installed. Use a stud finder to locate studs within the wall, as these will provide the best support for your shelf. If you find a stud, mark its position lightly with a pencil. If your desired location does not align with a stud, you will need to use wall anchors to ensure that the brackets hold securely.

    Once you have determined the bracket locations, hold the bracket against the wall and use a level to ensure it is straight. Mark the drill holes with a pencil to guide your drilling process. If you are drilling into drywall without studs, select proper wall anchors that can support the weight of the shelf and its contents. For heavy applications, toggle bolts or metal anchors are recommended. For light shelves, simple plastic anchors may suffice.

    Drill holes according to the size of the anchors you are using, making sure to drill straight to avoid any misalignment. After preparing the holes, insert the wall anchors into the drilled holes. For some types, you may need to tap them in gently with a hammer until they are flush with the wall surface. Once the anchors are in place, align the bracket holes with the anchors and use screws to attach the brackets securely. It is essential to tighten the screws adequately while ensuring they do not strip the anchors.

    Finally, repeat this process for any additional brackets required for your floating shelf. This meticulous approach to mounting will be vitally important in ensuring that your shelf is level and can support any items placed on it safely. Always prioritize safety by wearing appropriate gear, such as safety goggles, while drilling.

    Attaching the Shelf to the Brackets

    After successfully mounting the brackets on the wall, the next step involves placing the shelf onto these brackets. This is a crucial phase in the floating shelf assembly process, as the correct positioning and securement of the shelf determine its overall stability. Begin by carefully lifting the shelf and aligning it with the brackets, ensuring that it fits snugly between them. Take a moment to evaluate the positioning; the shelf should be centered and evenly aligned to achieve an aesthetically pleasing and functional result.

    Once the shelf is in position, assess the levelness using a spirit level. Place it across the shelf’s surface to ensure it is horizontal. If the shelf is tilted, make the necessary adjustments by either repositioning the shelf slightly or adjusting the brackets as needed. This step is essential as an uneven shelf may lead to instability and could compromise the security of items placed upon it. After leveling the shelf, double-check its stability by applying just a bit of pressure to see that it does not wobble.

    When you are satisfied with the shelf’s placement and levelness, begin the process of securing it to the brackets. This generally involves using screws that are specifically designed for your particular shelf and bracket setup. Insert the screws through the bracket holes into the shelf’s underside, ensuring they are tightened adequately but taking care not to over-tighten, which can lead to wood damage. Once this is completed for all brackets, give the shelf another gentle press to confirm it is still stable. Properly attaching the shelf ensures that it can safely hold any items you plan to display, contributing to both functionality and the overall appeal of your space.

    Styling and Decorating Your Floating Shelf

    Once your floating shelf is securely mounted, the next step is to transform it into a visual focal point in your home. The way you style and decorate your shelf can significantly affect the overall aesthetic of the space, making it important to consider various elements such as balance, color coordination, and personal touches.

    One effective approach when styling your floating shelf is to begin by considering the overall theme and color palette of your room. For instance, if your decor is minimalist and neutral, opt for sleek, simple items like a few well-chosen books, a small sculpture, or a potted plant in a similar color scheme. Conversely, if your space radiates vibrant colors, feel free to mix and match decorative items that showcase bold hues. This color coordination will help to create a cohesive look that ties the shelf into the surrounding decor.

    Balance is another crucial aspect to consider. To achieve a well-balanced appearance, alternate between taller items, such as books or decorative vases, and shorter pieces like candles or small figurines. Place heightier items on one end of the shelf and position shorter options on the opposite side. This arrangement creates visual interest and ensures that the shelf does not appear overly cluttered.

    Additionally, incorporating personal elements can add warmth and character to your shelf. Display travel souvenirs, family photographs in stylish frames, or keepsakes that hold sentimental value. These items not only personalize your space but also serve as conversation starters for guests.

    In summary, styling your floating shelf involves a thoughtful combination of color, balance, and personal touches. By integrating books, plants, and decorative items skillfully, you will enhance the overall attractiveness of your room and create a unique display that reflects your personal style.

    Conclusion and Final Tips

    Building a floating shelf is an achievable and rewarding project for beginners, allowing you to enhance your living space while honing your DIY skills. Throughout this guide, we have outlined the essential steps to construct your own floating shelf, highlighting the importance of proper planning, selecting quality materials, and employing the right tools. By following these structured steps, you will not only achieve a functional piece of decor but also truly appreciate the craftsmanship involved in DIY home improvement.

    As you embark on your floating shelf project, remember the significance of measuring accurately and ensuring sturdy wall support for secured installation. After completing your shelf, regular maintenance will help prolong its life and keep it looking pristine. Dusting the shelf routinely and checking the integrity of the mounting hardware will ensure it remains both aesthetically pleasing and safe for use. In addition, consider the weight limits of floating shelves to avoid potential sagging or damage over time.

    After building your floating shelf, why not consider other DIY projects that can complement your newfound skills? Additional shelving units, wall art displays, or even a DIY coffee table could be the next steps in enhancing your home. Exploring new projects will foster creativity and help you gain confidence in your abilities, enabling you to tackle more complex tasks as you progress.

    Embrace your motivation and take the initiative to delve further into the rewarding world of DIY home improvement. The satisfaction derived from crafting and improving your living space truly enhances your home environment while providing a sense of accomplishment. Happy DIYing!

  • Budget-Friendly Bathroom Upgrades That Look Luxurious

    Introduction: Elevate Your Bathroom on a Budget

    Creating a luxurious bathroom atmosphere doesn’t always require substantial financial investment. In fact, with a few strategically planned budget bathroom upgrades, it is entirely possible to achieve an elegant look and feel without stretching your finances. The secret lies in understanding which elements can be transformed to maximize both style and functionality in your space. Affordable bathroom makeover ideas can often involve simple changes that make a significant impact.

    Rethinking your existing bathroom can unlock its potential for a sophisticated appearance. For instance, refreshing paint colors, updating fixtures, or introducing new accessories can completely transform the room’s ambiance. Even choices such as changing out cabinet hardware or incorporating layered lighting can elevate the aesthetics. By focusing on these smaller, yet crucial, details, you can create a luxury bathroom on a budget that significantly enhances your daily experience.

    Exploring different bathroom upgrade ideas can help homeowners who may not initially consider renovations due to budget constraints. Implementing a few cost-effective updates may inspire confidence in tackling larger projects in the future. For example, replacing an old sink or showerhead can enhance both the look and functionality of a bathroom, giving it a fresh, modern feel. Moreover, utilizing decorative elements like mirrors or art pieces can also elevate the visual appeal without a hefty price tag.

    Ultimately, transforming your bathroom into a luxurious escape is not only achievable but also exciting. Small upgrades, when executed thoughtfully, can lead to an impressive evolution of the space while keeping expenses manageable. As you embark on this journey of improvement, remember that each choice contributes to an overall enhancement that you will enjoy for years to come.

    Choosing the Right Hardware for an Elegant Touch

    When considering budget bathroom upgrades, one of the most impactful yet often overlooked elements is the selection of hardware. The right faucets, cabinet handles, and towel bars can significantly enhance the aesthetic of your space, offering a luxurious feel without the need for a complete remodel. These small fixtures act as the finishing touches that create a cohesive and elegant look in your bathroom.

    Paying attention to the style of your hardware is crucial. Sleek, modern designs or classic, vintage styles can influence the overall character of your bathroom. For a contemporary look, consider hardware with clean lines, geometric shapes, and minimalistic finishes such as brushed nickel or matte black. Conversely, if you wish to evoke a sense of vintage charm, opt for ornate designs in polished brass or oil-rubbed bronze. Choosing the right finish not only complements your existing decor but also enhances the luxurious appearance of the space.

    Additionally, the materials used for these fixtures can make a substantial difference in both durability and appearance. High-quality materials like solid brass or stainless steel are not only resilient but also exude an air of sophistication. When selecting your budget-friendly products, it’s worthwhile to invest in hardware that stands the test of time while providing that much-desired luxury on a budget.

    To elevate your affordable bathroom makeover even further, coordinate hardware styles to ensure consistency throughout the space. Consistency fosters unity and harmony, which can make a modest bathroom transformation feel grand. As you contemplate bathroom upgrade ideas, remember that thoughtful hardware selection can dramatically reshape the ambiance, making it feel more upscale and inviting without exceeding your financial limits.

    Mirrors: A Reflective Upgrade

    In any bathroom, the choice of mirrors plays a crucial role in enhancing both the aesthetic appeal and functionality of the space. Mirrors not only serve as practical elements for daily grooming, but they also contribute significantly to perceptions of light and space. An effectively placed mirror can create an illusion of a larger area, which is particularly beneficial in smaller bathrooms. By opting for oversized mirrors or those with ornate framing, homeowners can elevate their bathrooms without breaking the bank. These budget bathroom upgrades allow for a more luxurious feel, aligning with the concept of an affordable bathroom makeover.

    When considering mirror options, it is essential to focus on the room’s style. For instance, a vintage frame can add character to a traditional bathroom, while a sleek, frameless design might suit contemporary aesthetics better. Additionally, mirrors with built-in LED lighting have become increasingly popular. They provide functional lighting for tasks, such as makeup application or shaving, contributing to a luxury bathroom on a budget. This strategic approach not only enhances utility but also adds a modern touch that can transform the overall ambiance.

    Placement is another key factor in optimizing the impact of mirrors in a bathroom. Positioning a mirror opposite a window can reflect natural light and make the space feel brighter and more open. For a touch of sophistication, consider placing two mirrors on either side of a sink, creating symmetry and balance. Incorporating mirrors into your bathroom upgrade ideas can significantly influence the room’s perceived depth and openness. With thoughtful selection and placement of mirrors, it is possible to achieve a refined, elegant atmosphere that harmonizes luxury with practicality.

    Lighting: Brightening Up Your Space

    When considering budget bathroom upgrades, one of the most impactful elements is lighting. The right lighting can transform an ordinary bathroom into a luxurious oasis. Replacing outdated fixtures with new, stylish designs can drastically enhance the room’s aesthetic. For a cost-effective update, consider selecting fixtures with modern finishes, such as brushed nickel or matte black, which can add a touch of sophistication without breaking the bank.

    Another way to elevate the ambiance is by incorporating ambient lighting. The installation of LED strips under cabinets or along shelves can create a warm glow that improves both functionality and aesthetics. Additionally, wall sconces flanking a mirror not only illuminate the space but also add visual interest. Such affordable bathroom makeover options allow for the creation of layers of light, which help in establishing an inviting atmosphere.

    Furthermore, the introduction of dimmers is a clever yet often overlooked solution for enhancing bathroom lighting. Dimmers provide the flexibility to adjust brightness as needed, which can be especially useful for creating a relaxing environment during evening baths or for highlighting bathroom features at certain times of day. Implementing these can give your space an added layer of luxury on a budget.

    Layering different types of lighting—ambient, task, and accent—will ensure that your bathroom upgrade ideas are functional and visually appealing. This combination not only maximizes the effectiveness of the lighting but also allows the bathroom’s style to shine through, making it feel more expansive and gracious. By focusing on these innovative lighting solutions, you can transform your bathroom into a space that radiates elegance while staying within your budget.

    Paint and Wallpaper: Transforming Walls Without the Cost

    When considering budget bathroom upgrades, paint and wallpaper stand out as some of the most effective options. A fresh coat of paint can instantly revitalize a space, creating a new atmosphere while remaining cost-effective. Selecting the right color is essential; light shades can make a small bathroom feel more spacious, while bolder colors can infuse energy into the environment. For a more luxurious feel, consider deep hues like navy blue or emerald green, which evoke richness and sophistication.

    Application techniques also play a crucial role in achieving a high-end look without overspending. Painting techniques such as sponge or stencil can add texture and interest to your bathroom walls, enabling a remarkable transformation that reflects your personal style. Additionally, using semi-gloss or satin finishes not only makes your walls easier to clean but also adds a subtle sheen that mimics luxury materials.

    Removable wallpaper has gained popularity as an innovative solution for those seeking an affordable bathroom makeover. Available in countless designs and patterns, it allows homeowners to embrace bold statements or even elegant motifs without a long-term commitment. This is particularly advantageous in spaces that may require frequent updates based on trends or personal preference. Furthermore, the application is simple, ensuring even those with little DIY experience can achieve professional-looking results.

    In choosing between paint and removable wallpaper, consider the long-term impact and ease of maintenance. While paint may require reapplication every few years, quality removable wallpaper can last for several years with proper care. Whichever option you decide on, utilizing these strategies for your bathroom upgrade ideas will grant you the satisfaction of achieving a stunning yet luxurious feel on a budget.

    Upgrading Fixtures: Small Changes, Big Impact

    When it comes to achieving a luxurious feel in your bathroom without overspending, upgrading fixtures is one of the most effective strategies. This approach allows homeowners to make significant enhancements to the overall aesthetic and functionality of their bathrooms. By opting for affordable bathroom makeover solutions, individuals can easily transform their spaces into a more elegant setting.

    Showerheads represent one of the simplest upgrades with a notable impact. High-efficiency showerheads with modern designs not only enhance water flow but also contribute to a spa-like atmosphere. Homeowners can select finishes such as chrome, brushed nickel, or matte black to complement their bathroom’s decor. These fixtures can be found at various price points, ensuring options are available for any budget while still allowing you to achieve a luxurious look.

    Another essential fixture to consider is the bathroom sink. Replacing outdated sink styles with contemporary options can drastically change the space. Vessel sinks or undermount sinks with sleek lines add a modern touch and can be paired with stylish faucets to elevate the design further. Opting for materials such as porcelain or tempered glass can enhance both durability and style, making your bathroom feel more upscale.

    Toilets have also evolved significantly, with many affordable models offering high-end designs and functionalities. Consider purchasing a dual-flush toilet, which provides more eco-friendly options while maintaining incredible style. There are numerous designs that seamlessly blend with various themes, from contemporary to traditional, ensuring any upgrade complements the overall look of the space.

    Incorporating these budget bathroom upgrades can yield astonishing results. Each fixture ensures improved functionality while allowing for a sophisticated ambiance. By making these small, strategic changes, homeowners can bring their dreams of a luxury bathroom on a budget to life, creating a welcoming environment without sacrificing quality or comfort.

    Accessorizing: The Finishing Touches

    When embarking on budget bathroom upgrades, it is essential to recognize the significant impact that accessories can have in transforming a space. Affordable bathroom makeovers often hinge on the thoughtful selection of decor items, textiles, and natural elements that enhance the overall aesthetic. Simple additions like plush towels, stylish bath mats, and chic decor can really elevate the look of your bathroom, giving it a polished and cohesive appearance without necessitating a major renovation.

    To achieve a luxury bathroom on a budget, focus on coordinating colors and textures. Opt for towels that complement the bathroom’s color scheme while introducing varying textures to create visual interest. For instance, mix soft cotton towels with a wicker basket or a sleek metal towel rack to add layers to your design. Colors can significantly influence the mood; lighter hues can create a sense of airiness, while deeper shades can add depth and sophistication. Incorporating a unified color palette will ensure that all accessories work together harmoniously.

    Additionally, the strategic use of greenery can further enhance your bathroom’s ambiance. Small potted plants, such as succulents or ferns, not only bring a touch of nature indoors but also contribute to a serene and spa-like environment. These plants are generally low maintenance and can thrive in the humidity of a bathroom, making them ideal choices. The integration of greenery alongside carefully chosen accessories can truly solidify the look of your affordable bathroom makeover.

    In conclusion, accessorizing is a vital aspect of any bathroom upgrade ideas aimed at maximizing visual appeal on a budget. By selecting harmonious colors, textures, and incorporating natural elements, you can create a luxurious atmosphere without the need for costly renovations.

    Creating a Spa-Like Atmosphere

    Transforming your bathroom into a serene sanctuary does not need to break the bank. By implementing simple yet effective ideas, you can create a spa-like atmosphere that provides a sense of relaxation and indulgence. One key element in achieving this ambiance is the use of calming color palettes. Soft shades of blues, greens, or neutral tones can evoke tranquility, making your space feel more inviting and peaceful. Consider repainting your walls or adding accessories in these soothing colors to enhance the serenity of your room.

    Aromatherapy can also elevate the overall experience of your bathroom. Incorporating essential oils, scented candles, or diffusers filled with calming fragrances such as lavender or eucalyptus can create a refreshing and relaxing environment. Not only do these scents promote a sense of calm, but they also enhance the luxurious feel of your affordable bathroom makeover. Look for budget-friendly options that can be combined to create a charming, fragrant escape.

    Another essential aspect of a spa-like atmosphere is the incorporation of soft textiles. Towels made from plush materials, bath rugs, and elegant shower curtains can greatly improve the aesthetic appeal of your bathroom. Choose textiles in complementary colors and patterns that harmonize with your chosen theme. For budget bathroom upgrades, consider shopping at discount stores or sales to find high-quality, affordable items that lend an aura of luxury and comfort.

    Lastly, consider incorporating natural elements into your decor. Plants, whether real or artificial, can enhance the feeling of tranquility by introducing life and a touch of nature into your space. A small potted plant on the counter or shelf can make your area feel more organic and inviting. By utilizing these simple ideas, you can transform your bathroom into a calming retreat without compromising on style or exceeding your budget. In conclusion, with a few thoughtful enhancements, your bathroom can embody the luxury of a spa while being truly budget-friendly.

    Conclusion: Your Path to a Luxurious Bathroom on a Budget

    Transforming your bathroom into a luxurious retreat does not have to come with a hefty price tag. As explored throughout this blog post, there are numerous budget bathroom upgrades that can enhance the visual appeal and functionality of your space without breaking the bank. Simple yet effective ideas, such as fresh paint, updated fixtures, and strategic decorative accents, can significantly alter the ambiance of your bathroom, giving it an upscale look.

    One of the key takeaways is that luxury is not solely determined by expensive materials but can also be achieved through thoughtful design and creativity. An affordable bathroom makeover can be achieved by prioritizing elements that provide maximum impact. For instance, replacing hardware, adding a new mirror, or installing a stylish shower curtain can evoke the feel of a high-end bathroom without substantial investment.

    Furthermore, considering bathroom upgrade ideas that utilize DIY methods can lead to significant savings while adding a personal touch. Engaging with these projects allows homeowners to reflect their style, turning an ordinary bathroom into a personalized oasis. Incorporating elements such as layered lighting and well-chosen accessories can elevate the overall aesthetic while maintaining a budget-friendly approach.

    Ultimately, anyone can achieve a luxury bathroom on a budget by embracing small, manageable changes to their space. Encouragingly, these upgrades are not just limited to aesthetics; they can also contribute to the functionality of the bathroom, ensuring a more enjoyable experience. By taking the first steps, readers can move towards creating a bathroom that both looks and feels luxurious, emphasizing that an elegant space is attainable for everyone.